sock knitting

It's time for another Twitter chat

I can't believe that it is already a month since our first Twitter chat but the calendar doesn't lie, and as Christmas approaches with the speed of a freight train I'm quite looking forward to spending a cosy night in with you all tonight, talking about socks and maybe drinking a glass of mulled wine.

So, lets talk about socks and specifically the gifting of socks. Do you knit socks for gifts? D you have a list as long as your arm of willing recipients, or do you keep sock knitting purely for yourself? If you have any tips or tricks for gifting socks or any cute way ways of packaging them please pop along and join in the chat.

If you aren't sure what a twitter chat is - please see this previous blog post.

So grab, your festive tipple of choice and join us at 8pm tonight (GMT, London)

What exactly is a Twitter Chat?

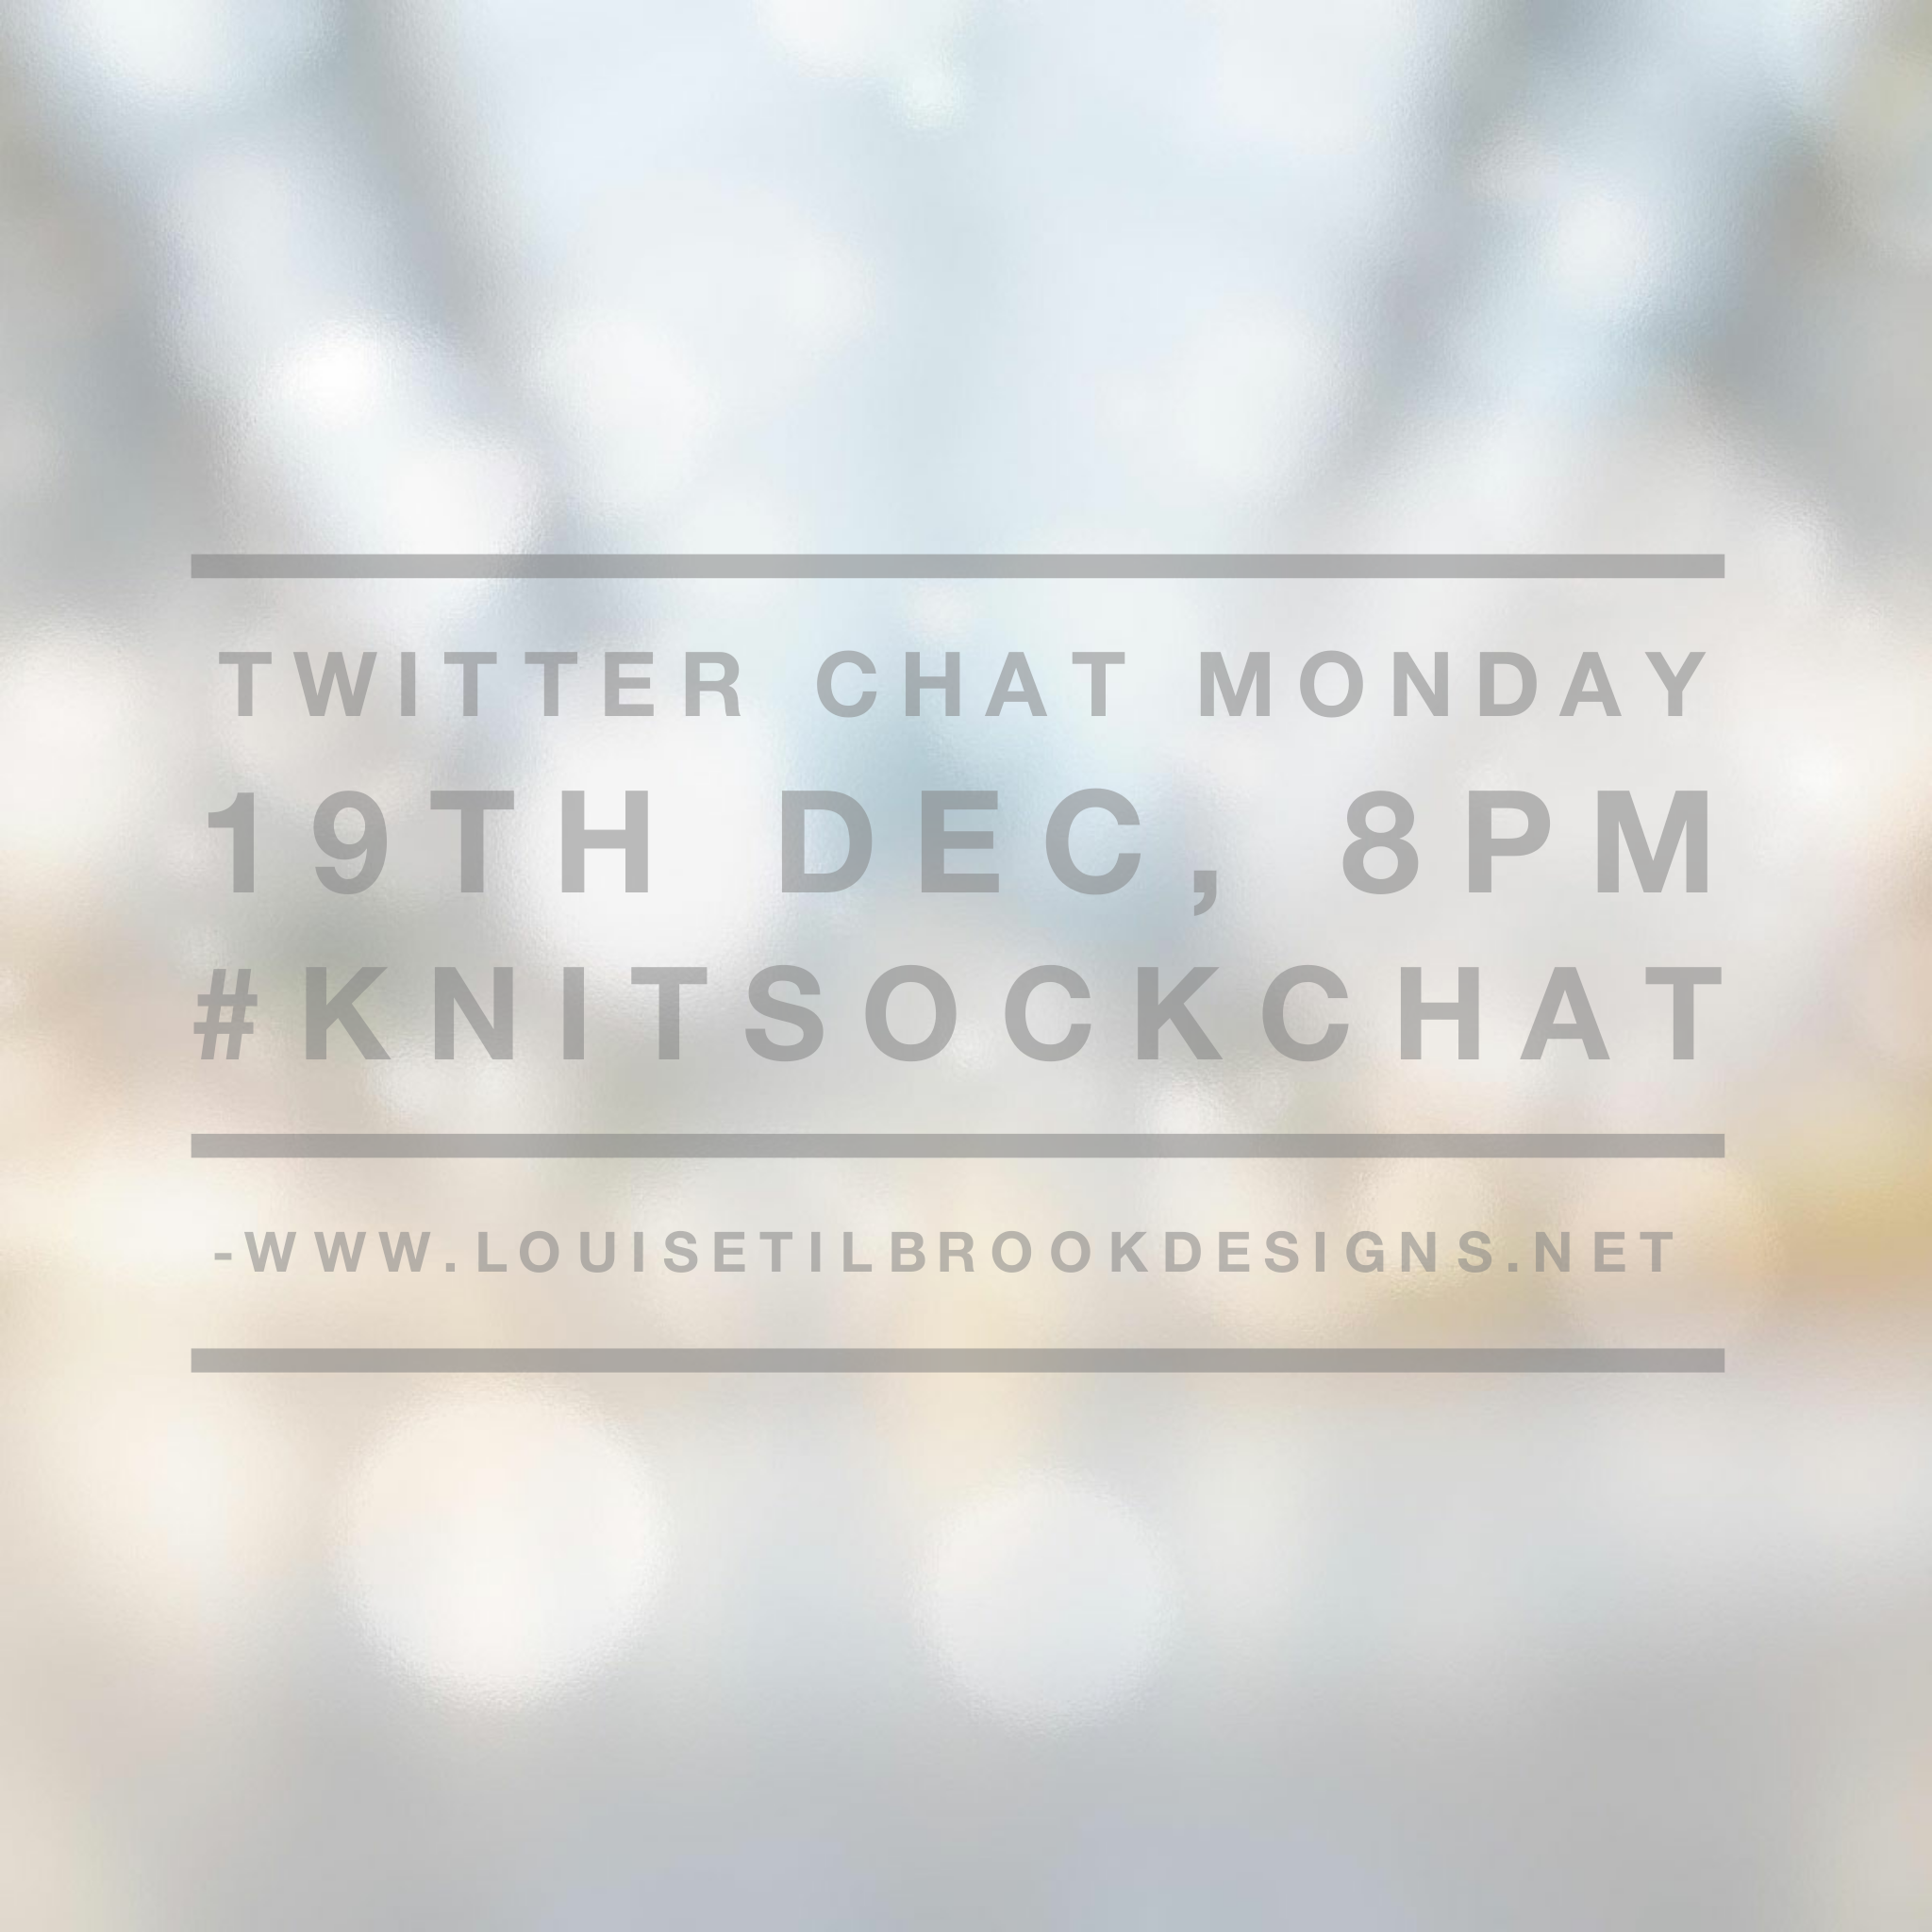
On Monday 21st November 2016 (at 8pm GMT,London) I am going to be hosting the first of my monthly Twitter Chats aimed at everyone who loves to knit socks - and I know there are a few of you out there.

So far so good, but what exactly is a Twitter Chat, I hear you say.

Well, fear not. It isn't scary. It is just a bunch of people chatting on Twitter but instead of randomly chatting amongst ourselves we use the hashtag #KnitSockChat. This enables us to see all the conversations going on around us and to join in and hopefully make new friends who share our love of all things to do with knitting socks.

Most Twitter Chats last for an hour but don't worry - it's fine to dip in and out as you can. Most of us have other things going on in the evening - small people, pets or significant others clamoring for attention - but the beauty of Twitter is that you can join in as it suits you and no one will be offended if you bow out. Or if you are can't to join in at the time you can catch up with the conversations later and find out what you missed.

To give us something to get us started I will post 3 questions or topics during the chat:

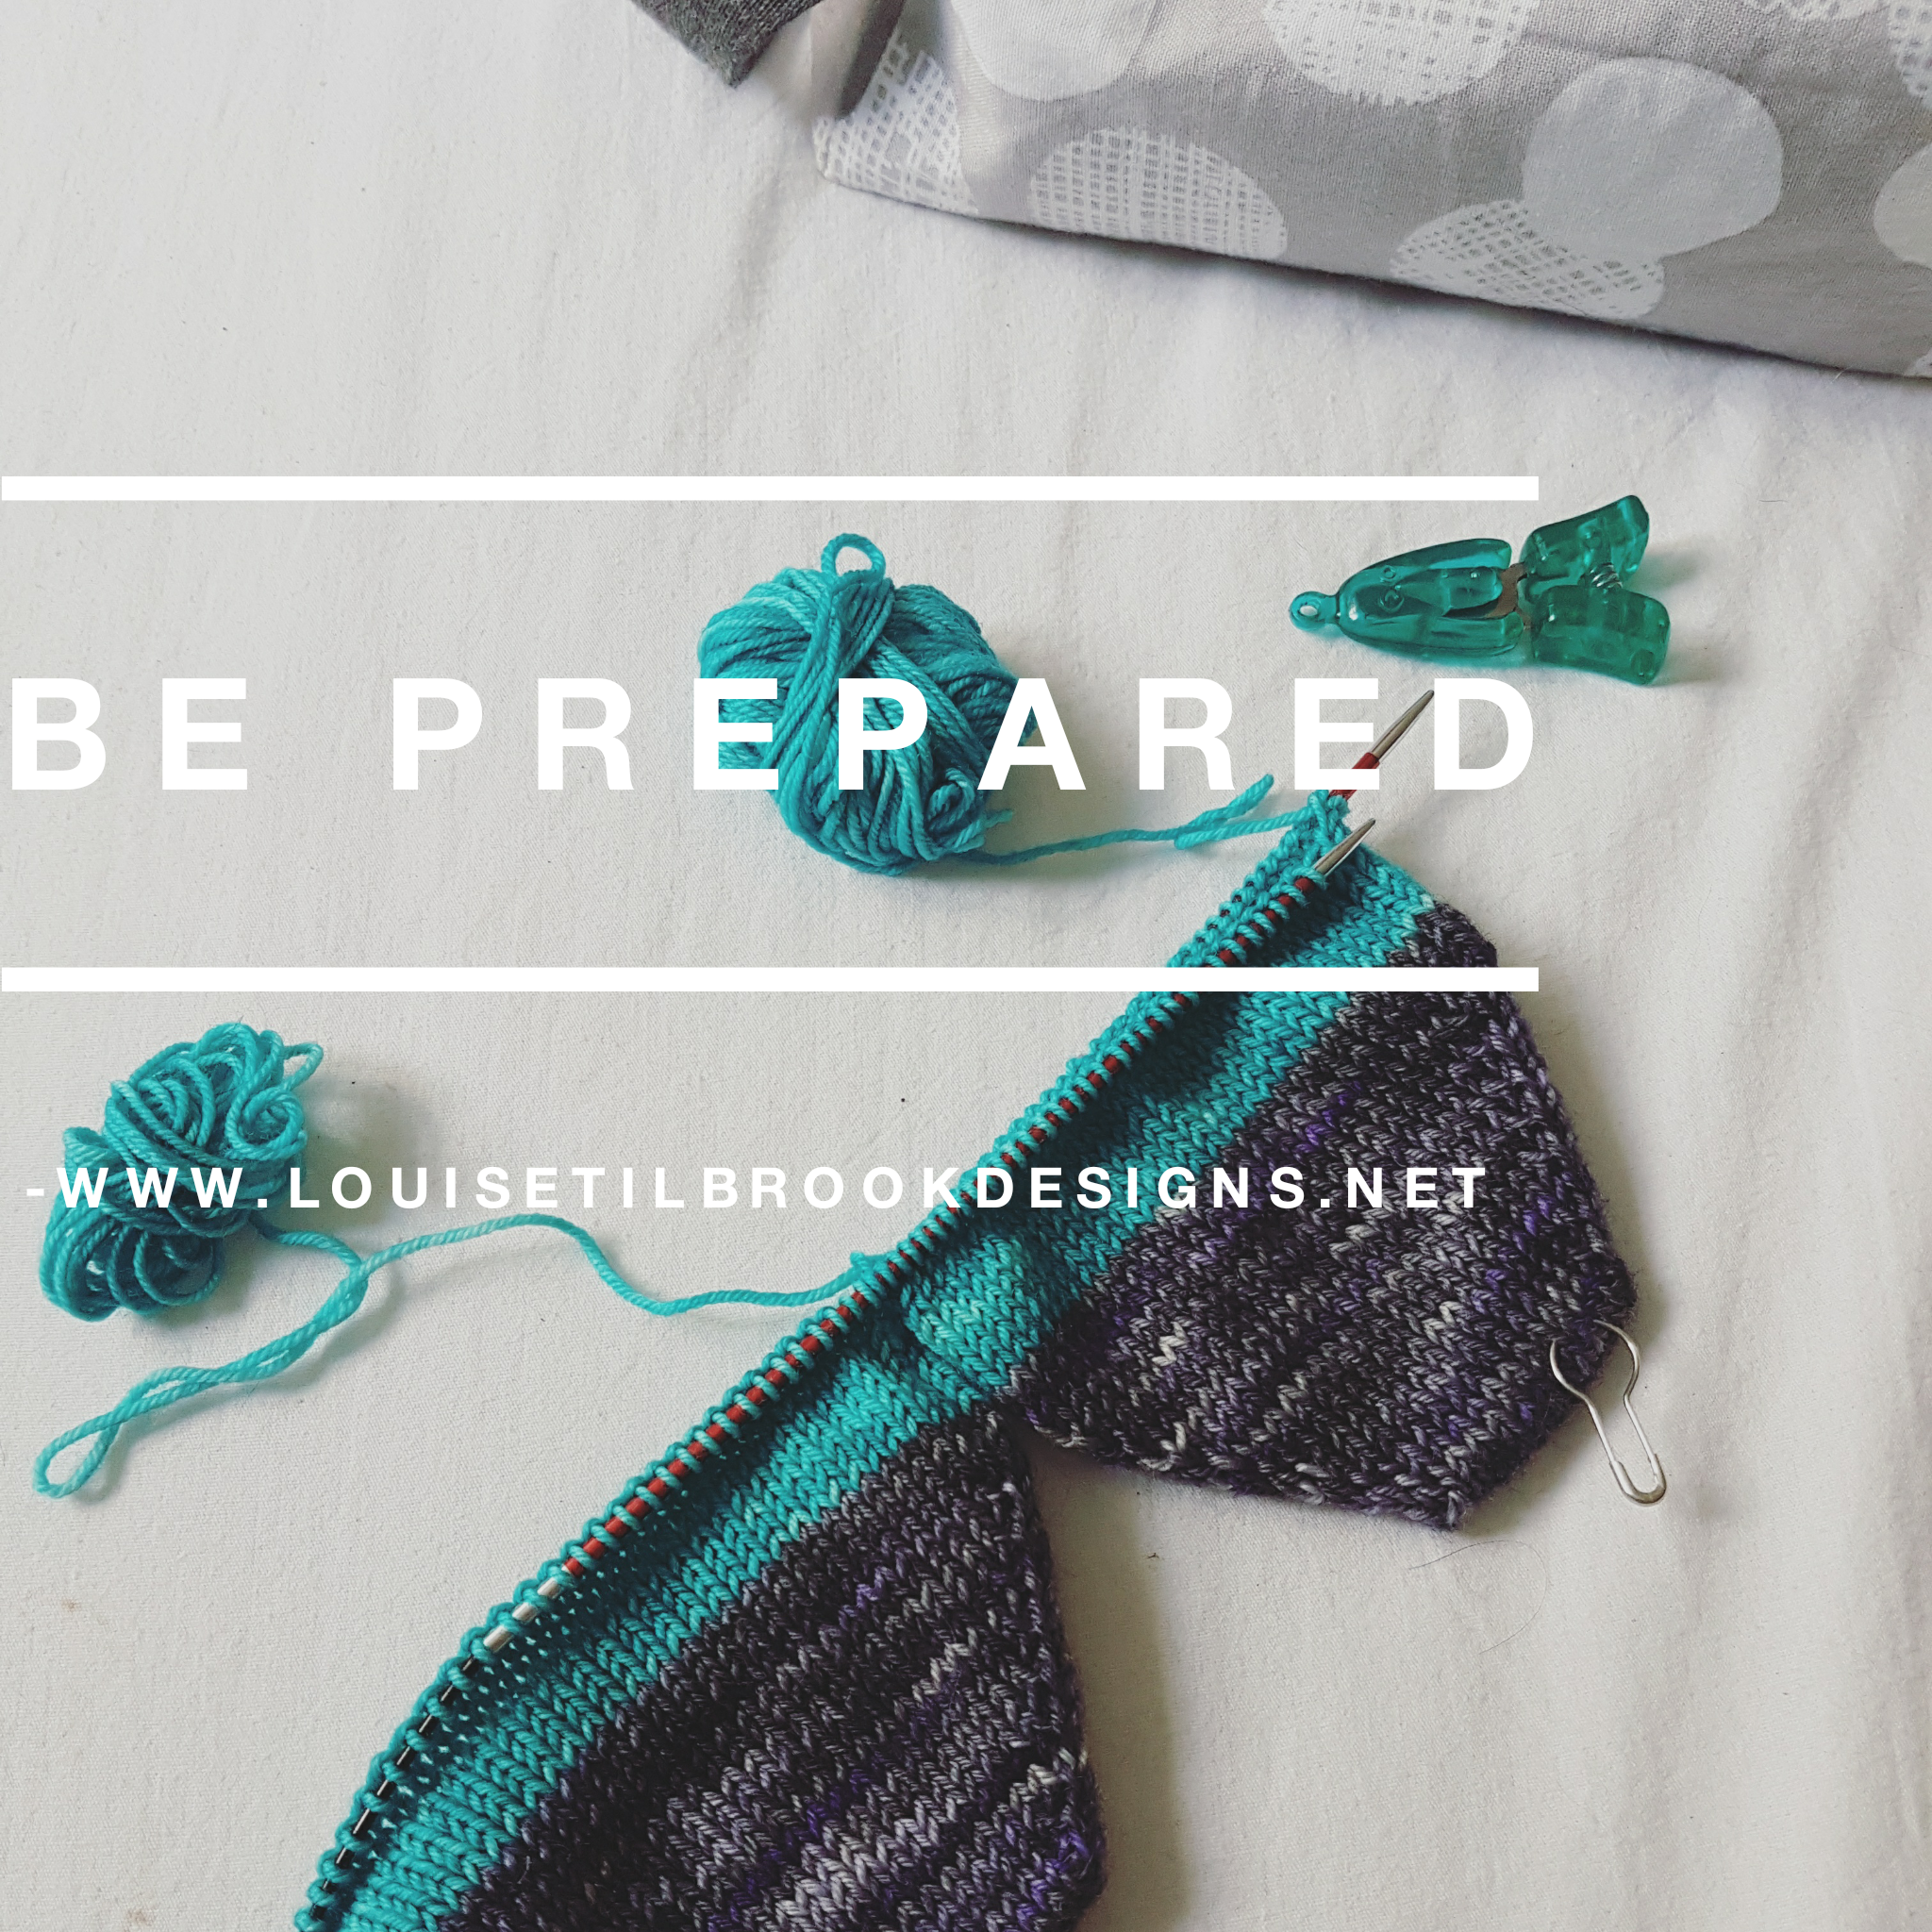
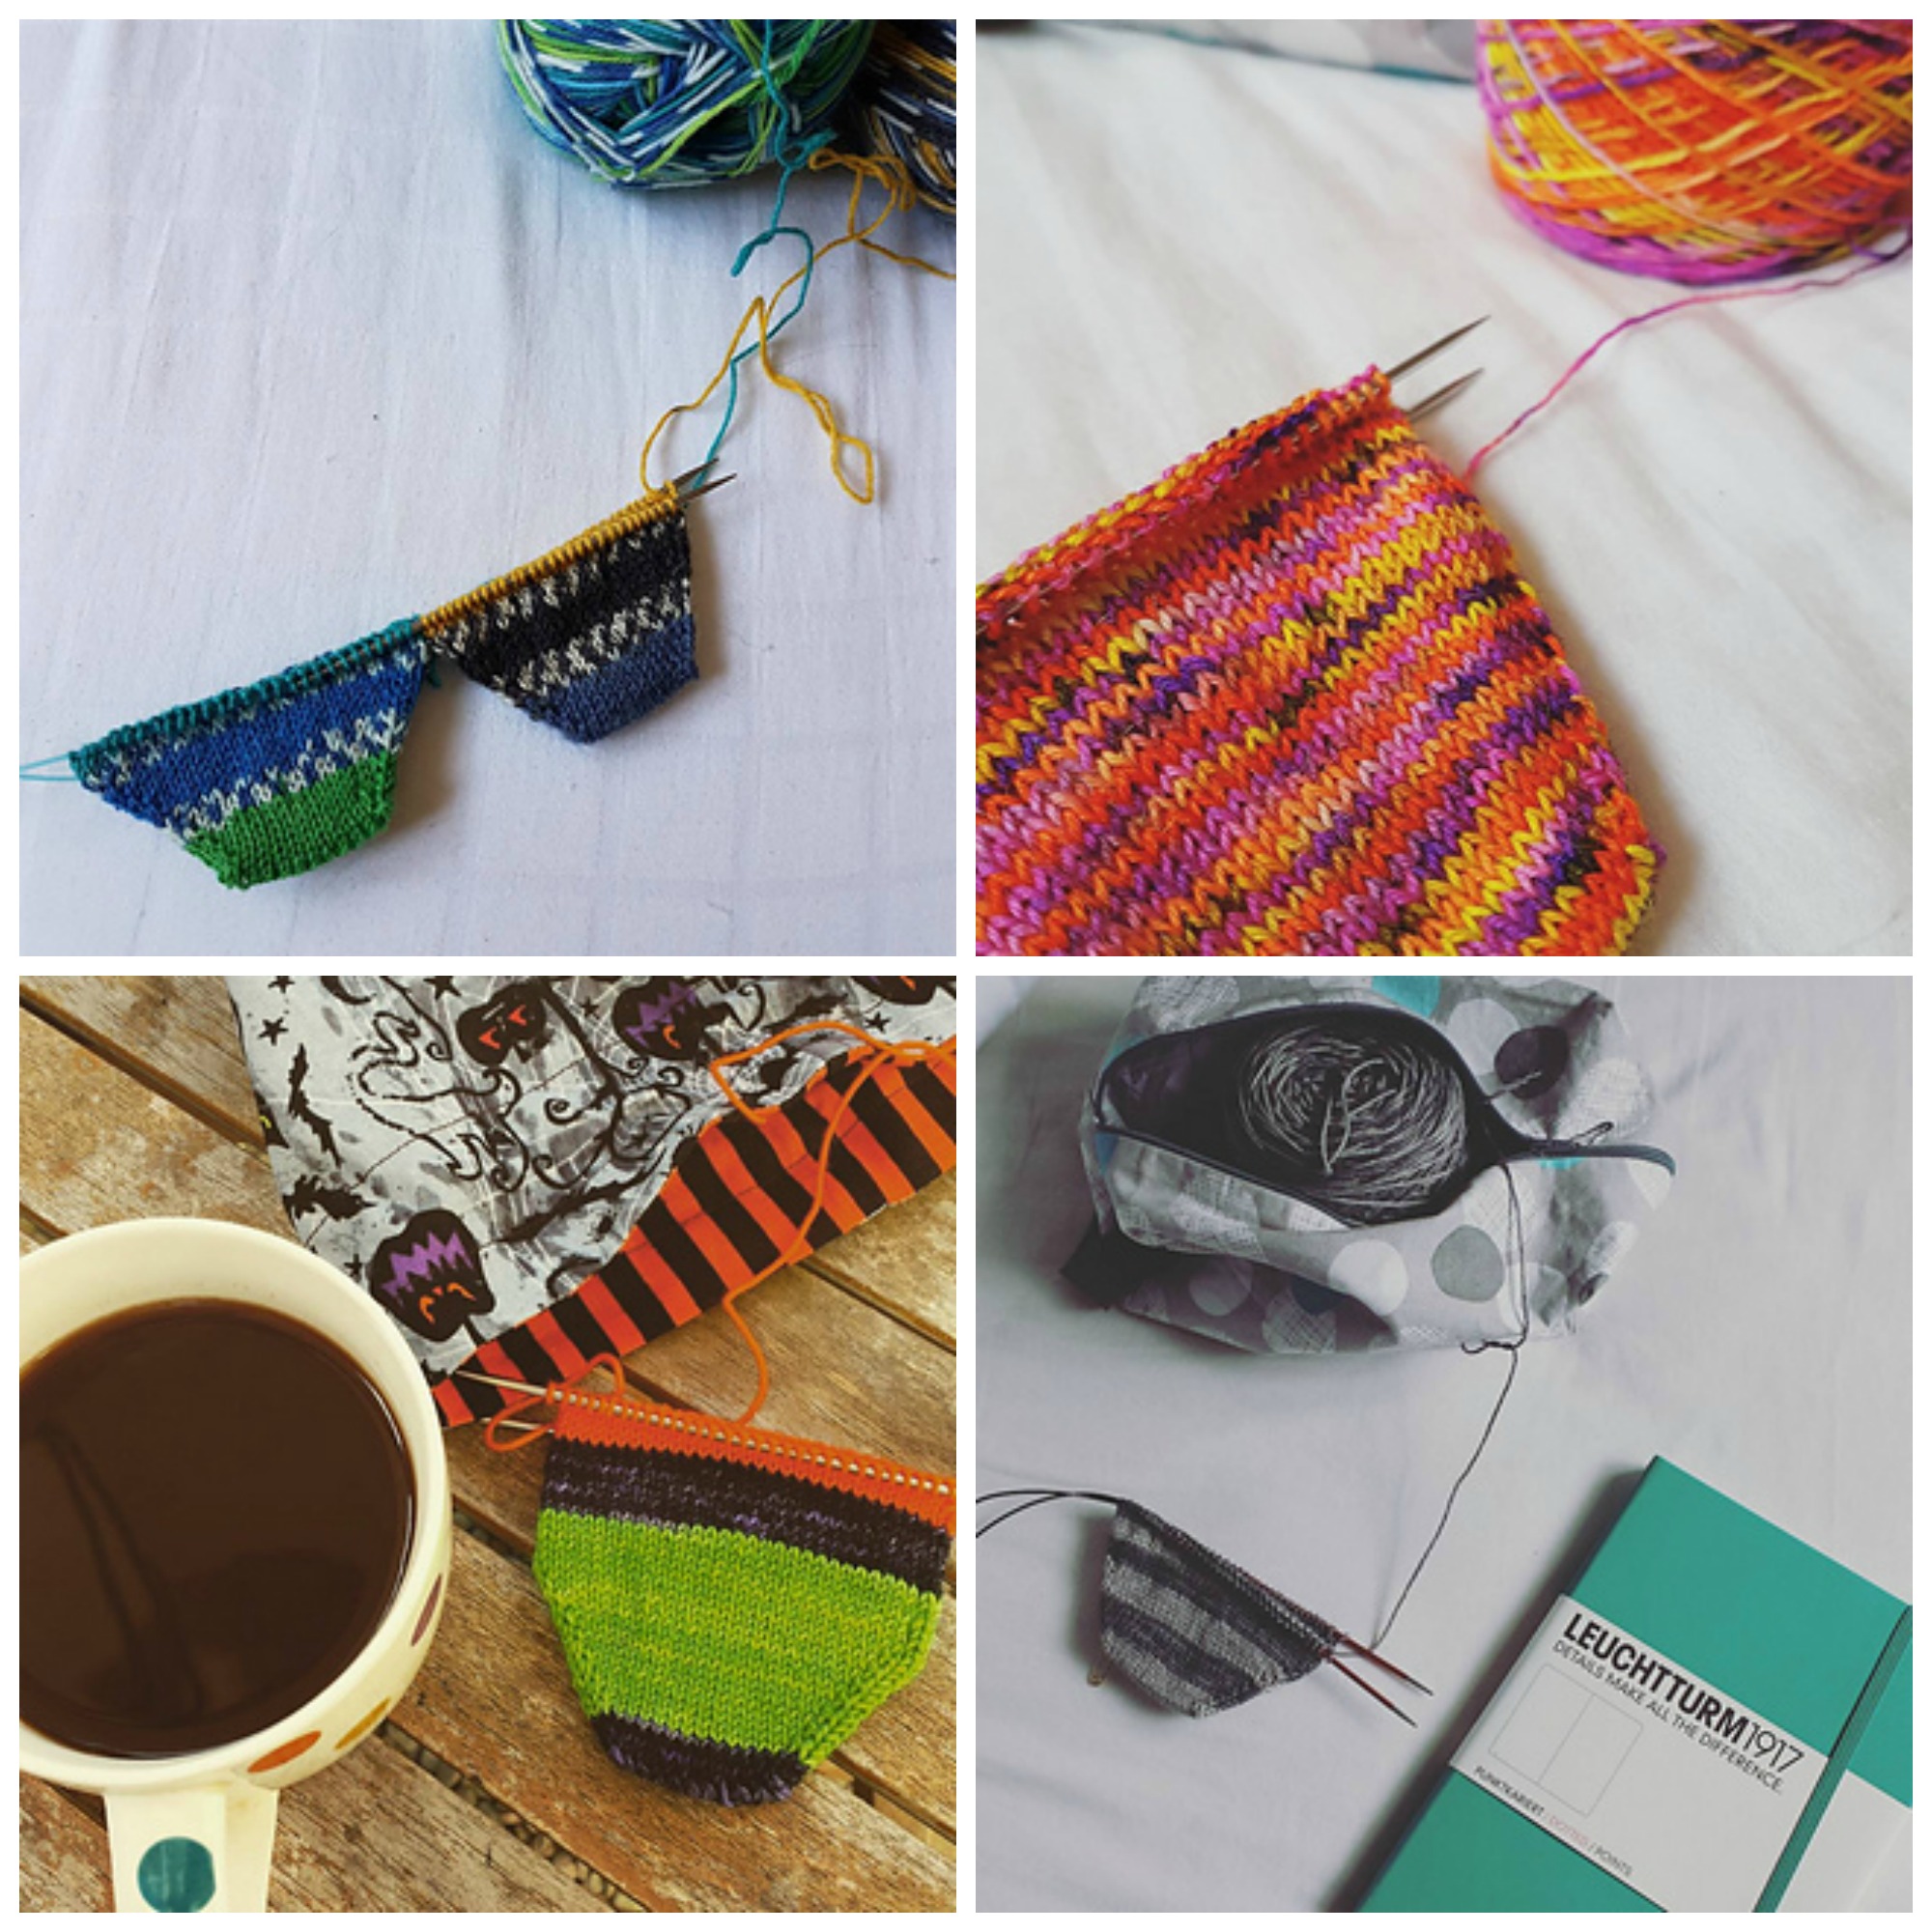
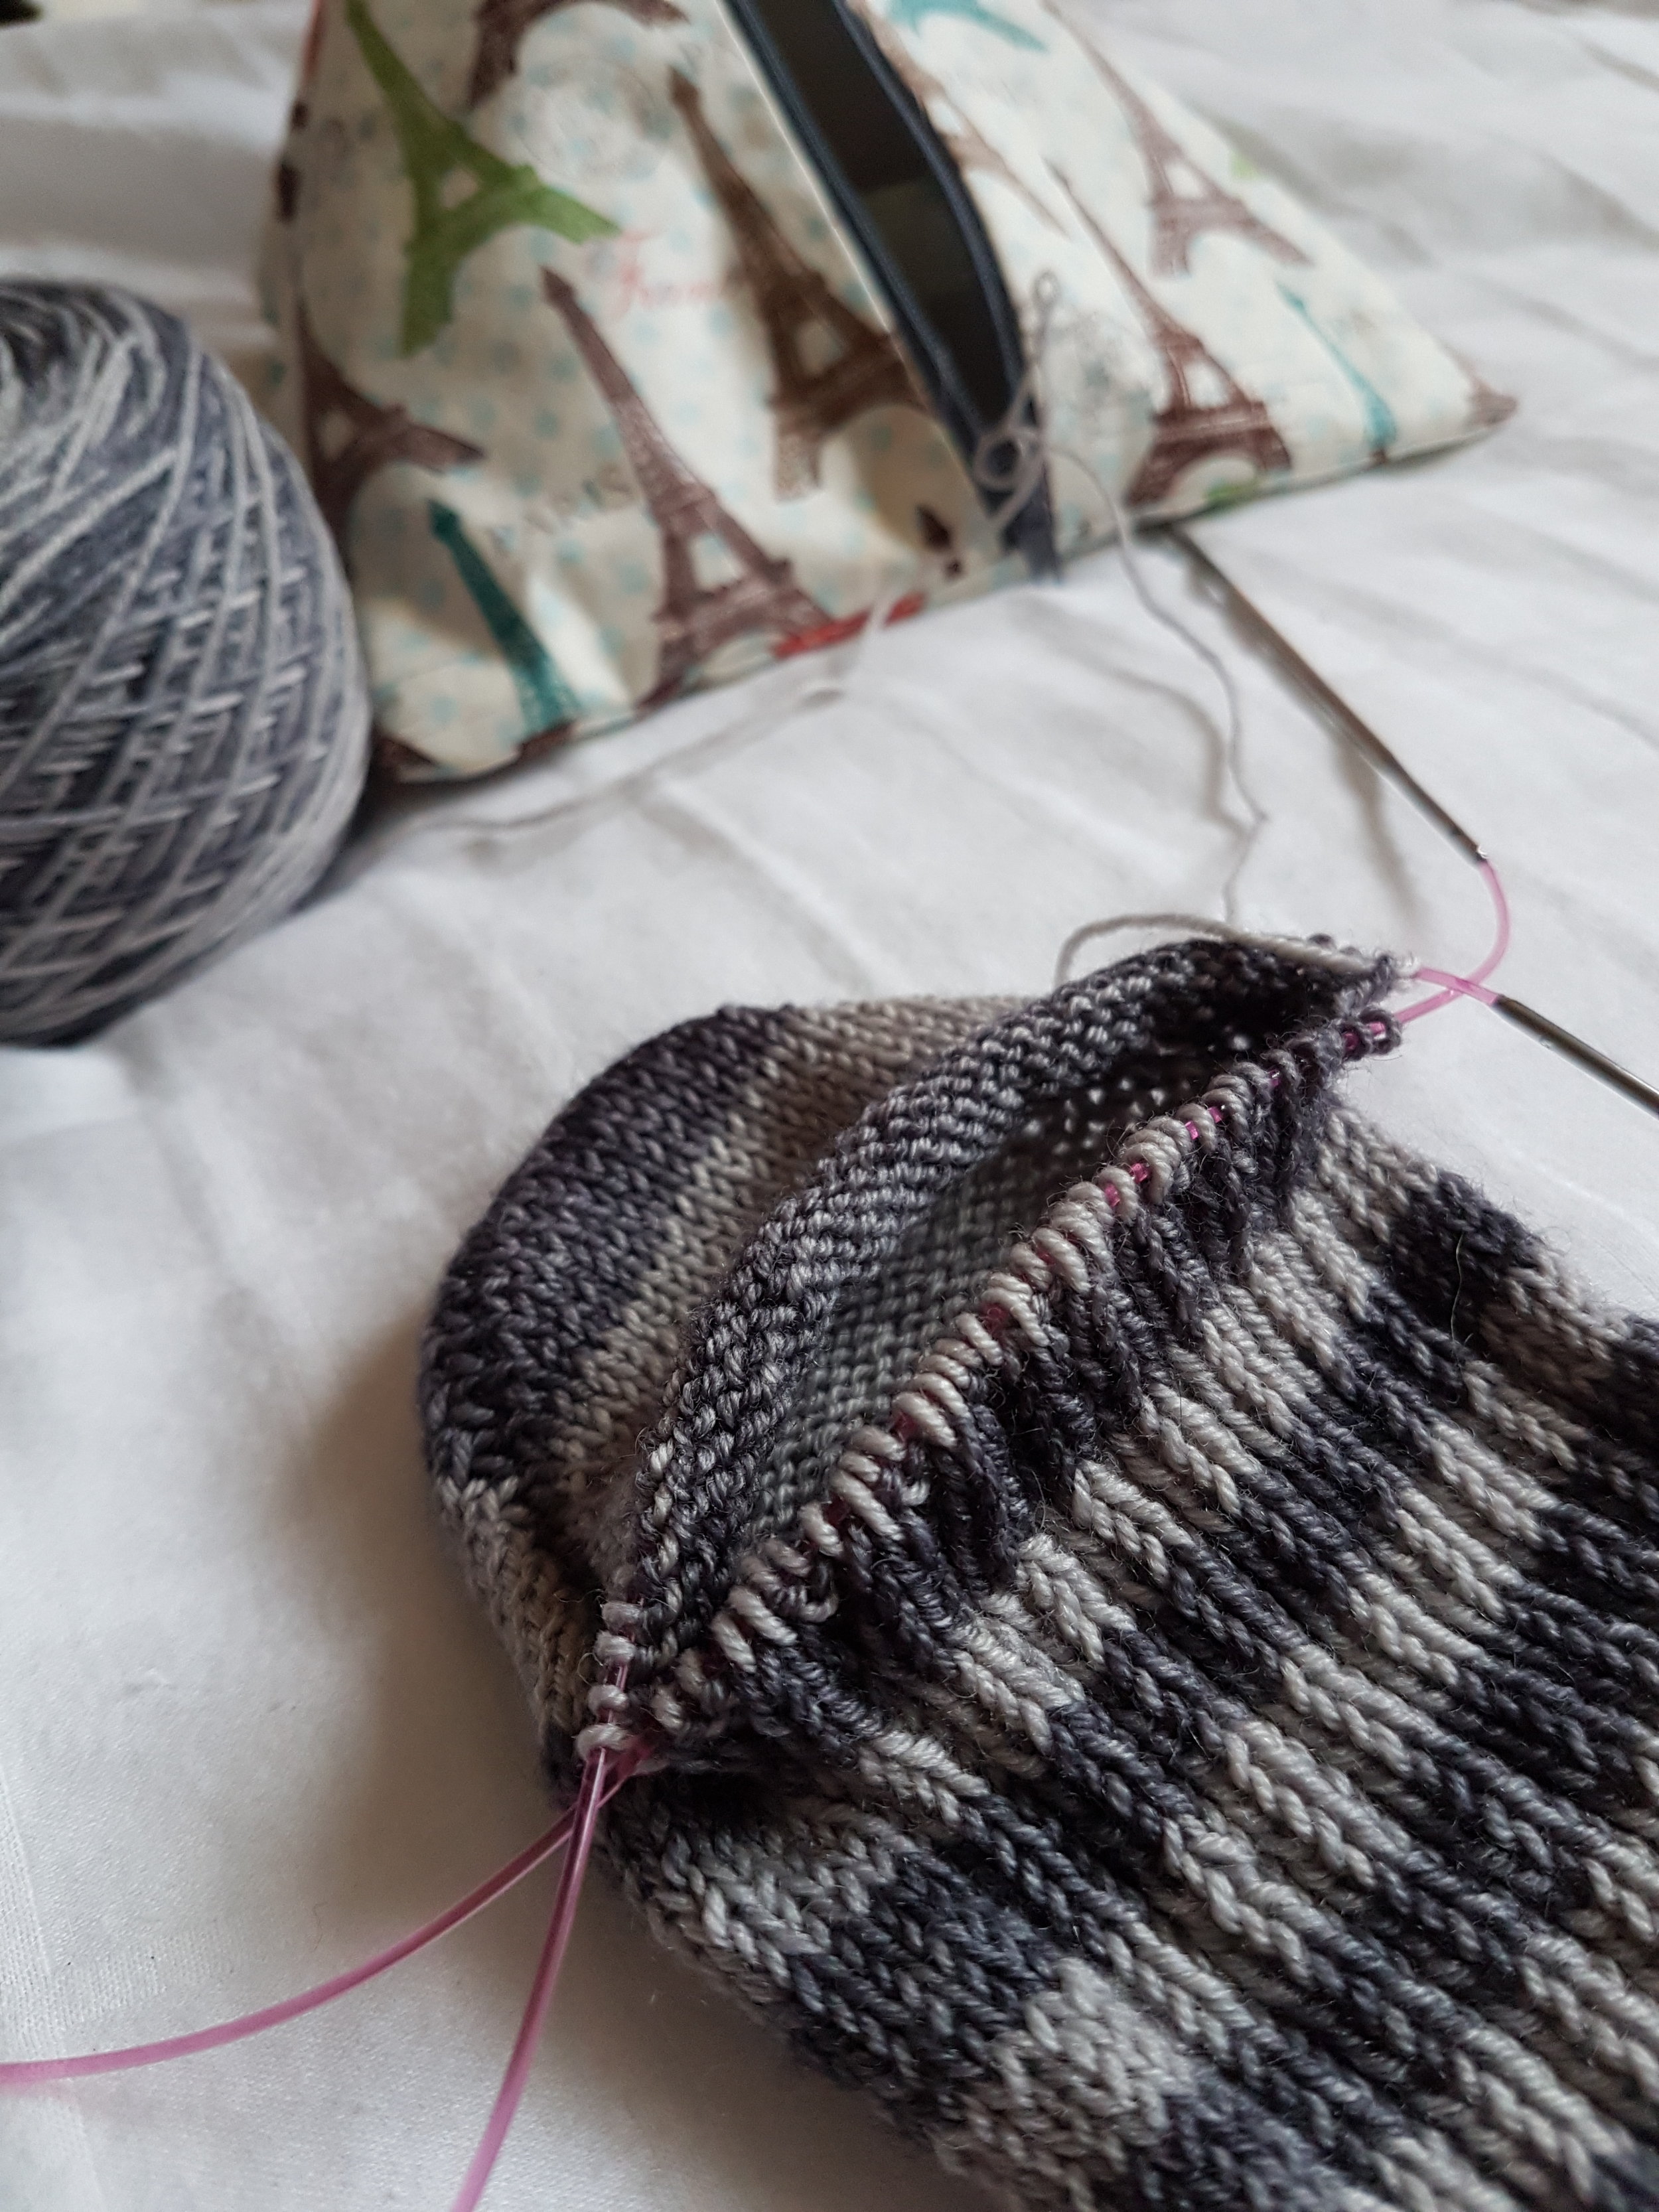
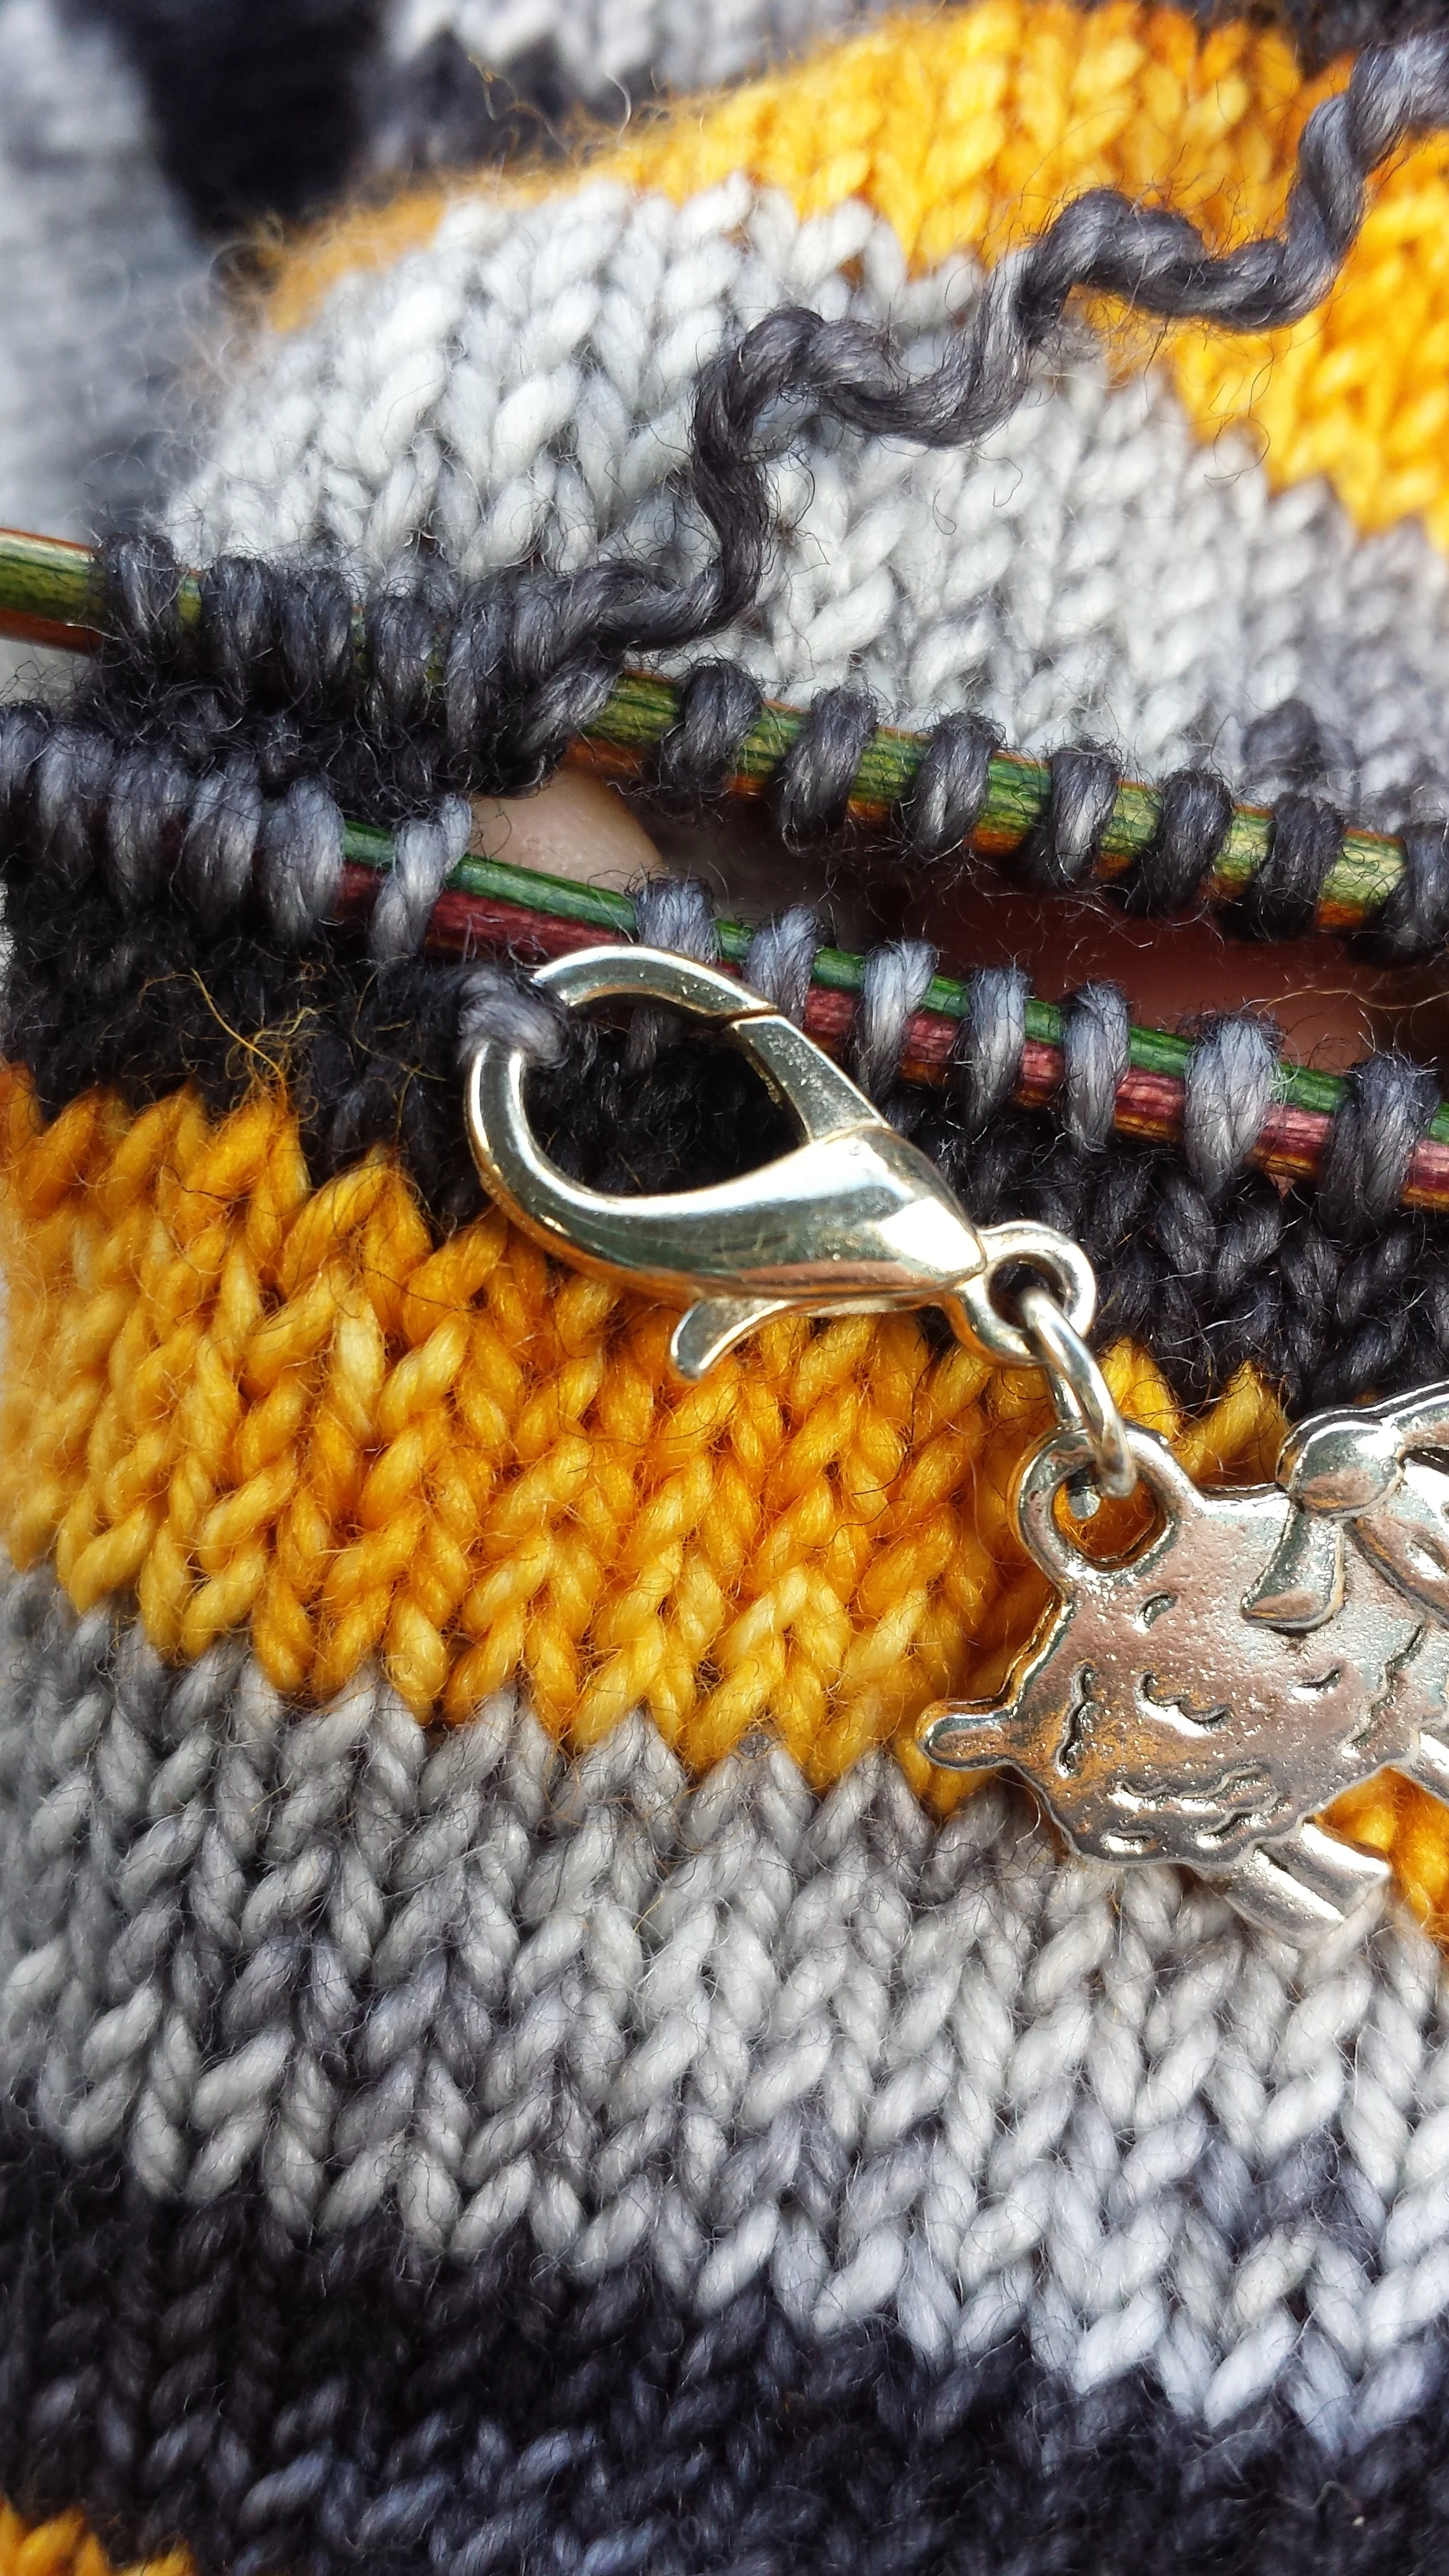
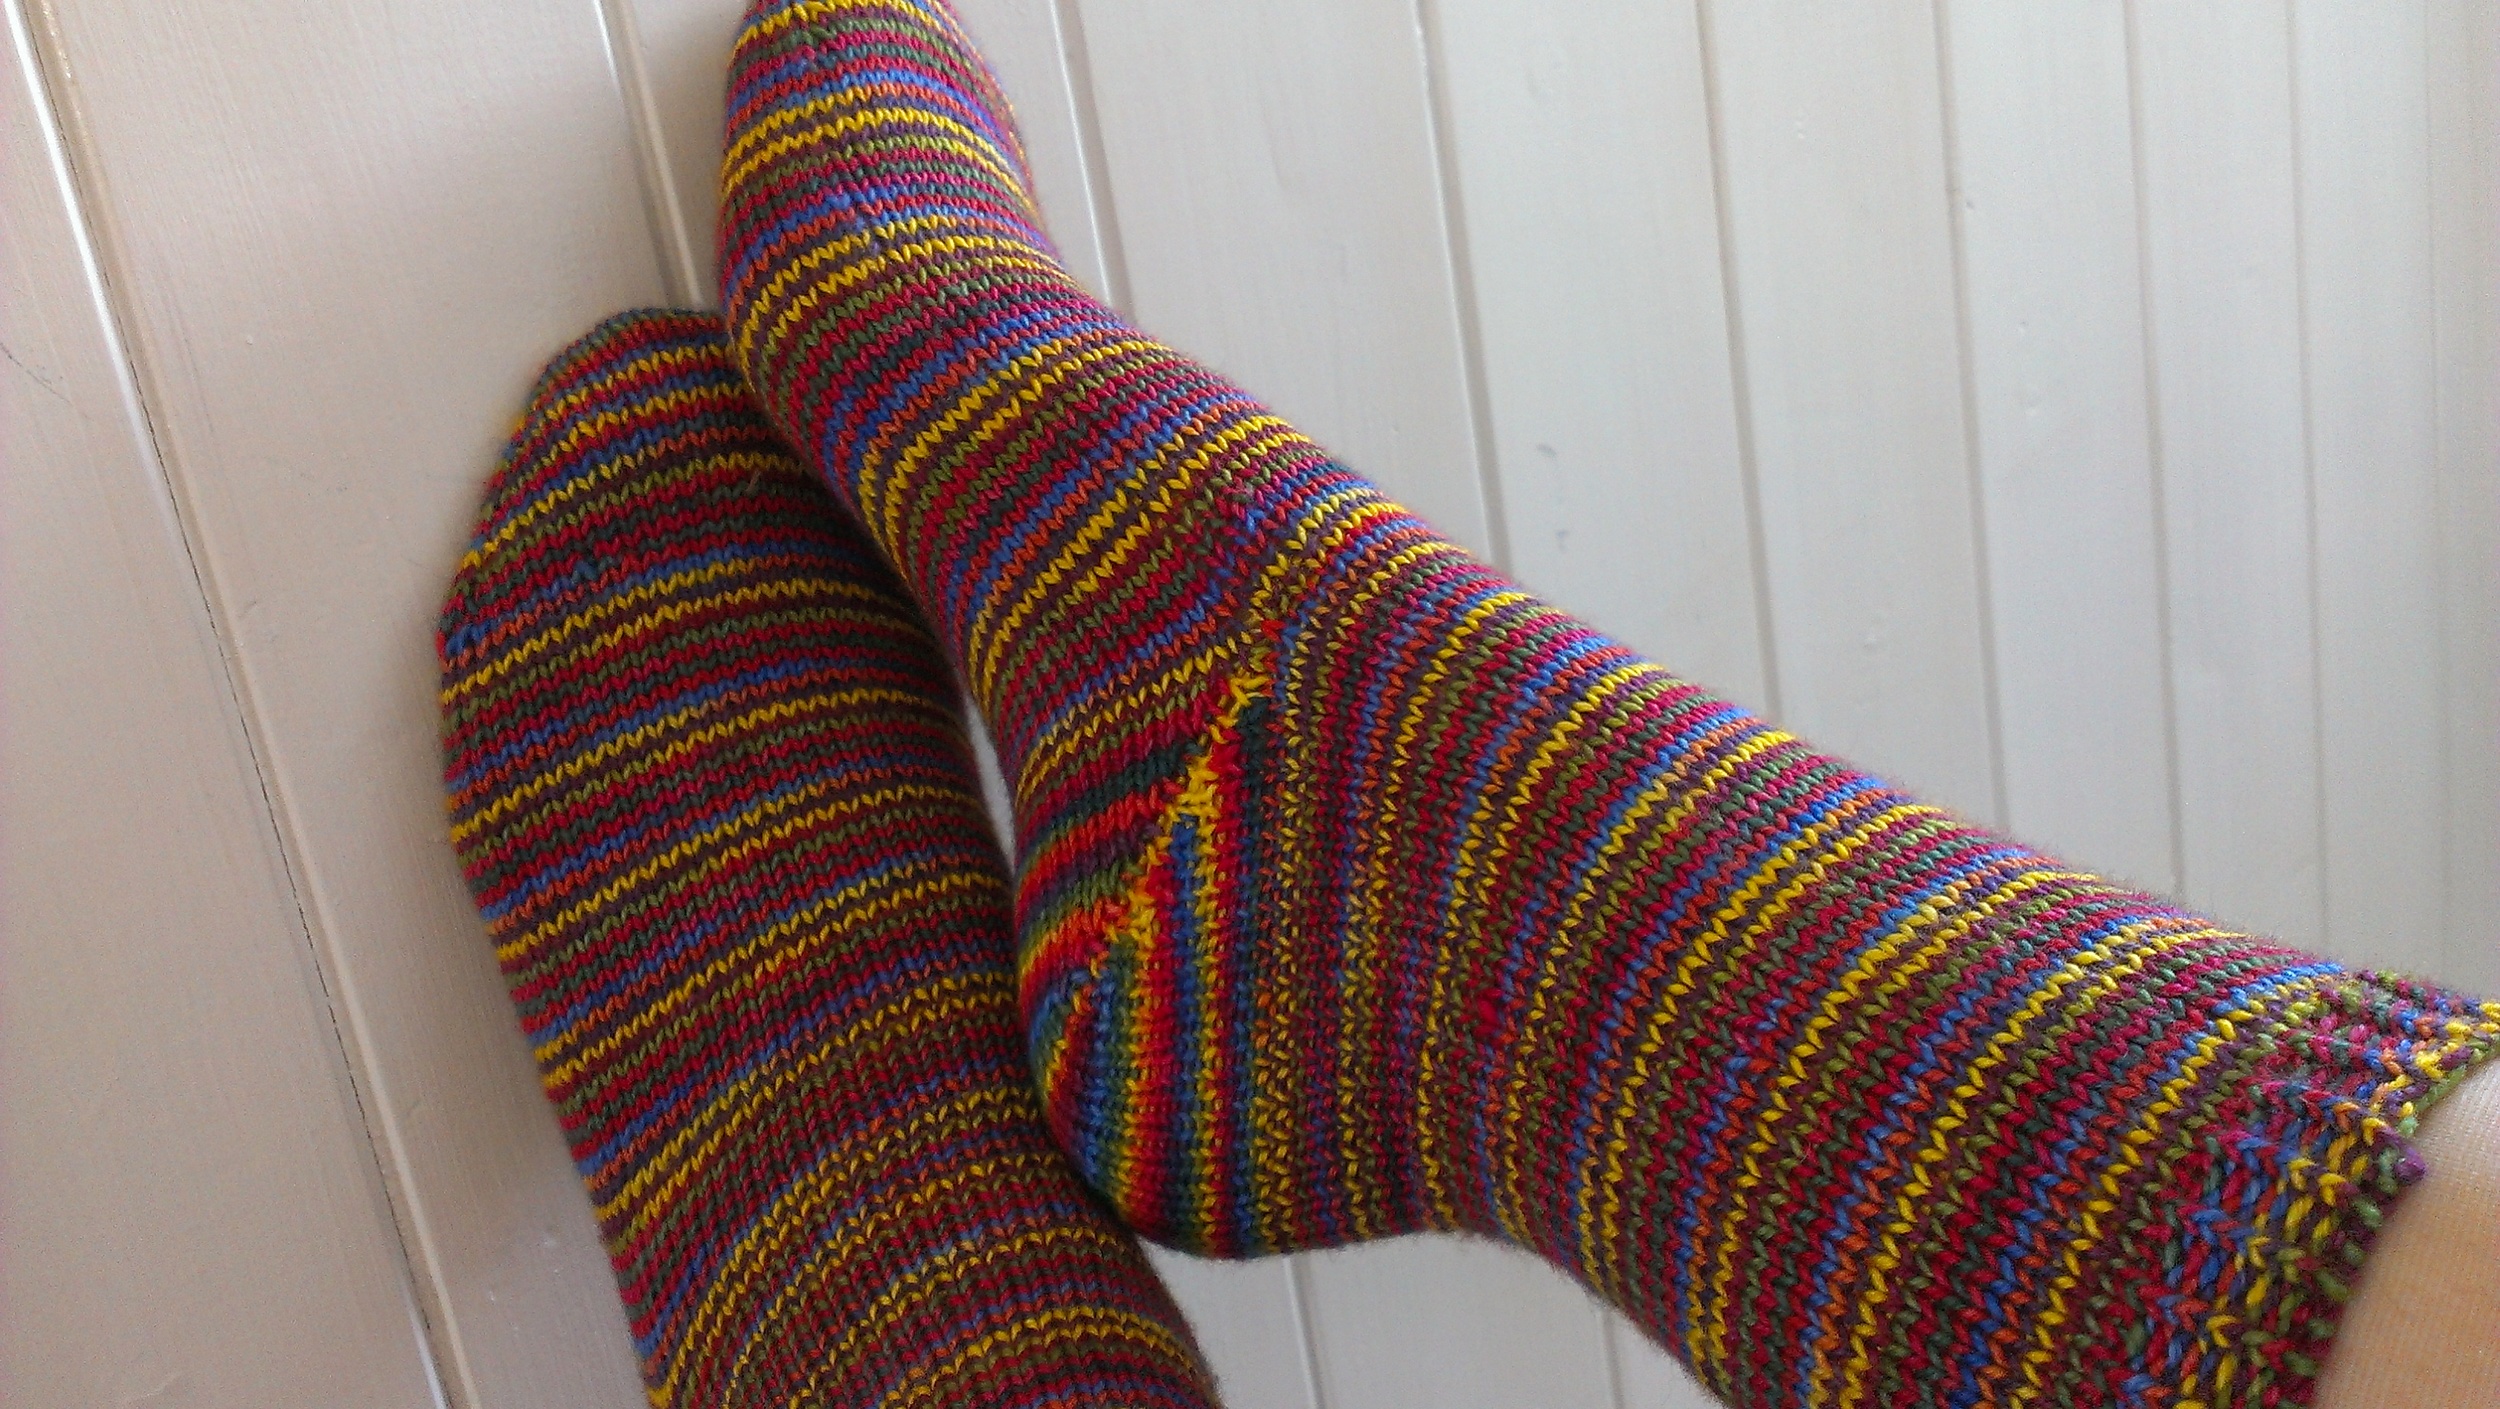
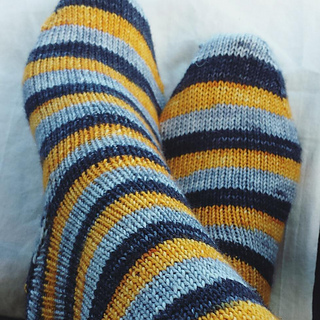
Q1: Show us a picture of your favourite knitted socks or sock WIP. What do you love about them?

Q2: Patterned socks or plain vanilla?

Q3: Do you knit for others or just you?

To help you get the most out of the Chat it helps to remember to use the hashtag #KnitSockChat on each of your posts - this will help everyone else to find you. And also if you answering a specific question, preface your comment with Q1, 2 or 3.

With these simple guides in mind, grab a beverage of choice and join us for some serious sock chat.

I look forward to seeing you there

x

The joys of scrappy socks

If you aren't ready for the commitment of a full-on sock yarn blanket, scrappy socks can be a fabulous way to use up all those odds and ends. There is a wonderful hashtag on Instagram called #frankensocks and this is well worth a look for inspiration. Totally mismatched, fun and colourful these type of socks look amazing and are totally unique.

If, like me , your brain can't deal with totally random socks you could always strike a happy medium by knitting striped socks in brightly contrasting colours. I knit a pair recently, using them as an opportunity to showcase a range of sock yarn leftovers in my stash from some of the very talented indie dyers we have here in the UK. To make sure that the socks matched - there's my inner control freak talking - I knit them toe-up, two at a time on a long magic loop needle. This did involve a bit of extra faffing as I had to wind off enough yarn for 2 balls, but with each stripe/ball only taking 3-4g this wasn't particularly onerus.

In fact, just between me and you, it sometimes took me longer to decide on the next yarn stripe than it did to wind it and knit it.

Taking the #franskensocks theme a step further there are some very popular advent themed scrappy socks projects out there too. The Opal Sock Yarn Advent calendar is a very popular one which is almost certainly sold out by the time you read this as the kits went on sale around the beginning of October. Many thrifty-minded knitters however have decided to do their own advent socks - knitting a stripe each day on their socks - ending with a snazzy new pair of socks ready to wear on Christmas Day. Some have even gone the whole hog and have their set of little yarn balls all ready to go in individual sealed bags. With all the hectic preparations going on before the holidays, there is something very pleasing and soothing about making time to sit down each day and knock out out a stripe or two on your fun, colourful project.


Getting ready for a new twitter chat

Carrying on the Socktober theme into the coming months I am really excited to share with you the news that I am planning to start a live monthly Twitter chat. I have recently really enjoyed participating in a few such chats - most notably #makingwinter and the fabulously informative #instachat run by Sara of @meandorla fame.

There is an undeniably energy associated with lots of like minded folk coming together to share tips, tricks and a general buzz for their passion and as much as I love Instagram, for real-time conversations and banter it hard to beat Twitter.

So, put a date in your diary for Monday 21st November at 8pm (GMT). For non-UK folks,  use the handy converter here to find out what time this is in your timezone.

I will be using the blindingly original hashtag #KnitSockChat - I did honestly try to come up with something more inventive - but hey, it does what it says on the tin.

Please look out for reminders on social media and about a week in advance I will be posting a list of 5 questions to serve as prompts and a focus for our discussions in the hour long chat. If there are any burning issues to do with sock construction that you would like addressed please do get in touch. It would be great to hear from you. Similarly, please do share the news with others, I'd love to reach as many people as possible and help spread the sock love.


Be prepared

Toe-up socks, two at a time on magic loop. Heaven.

Sit a group of sock knitters down in a room and I can spend ages marveling at our different techniques and materials. Basically we are all producing a circular tube of knitted fabric but very rarely are two knitters working the same way. Some are devoted DPNs fans (either using 4 or 5 needles), some love the tiny 30cm circular needles. Then we have magic loop devotees and those who prefer using two small circular needles. Of all the techniques I have tried the latter is the only one that I really can't embrace. For the others each has their time and place as far as I'm concerned.

An on-the-go essential. Stripy sock on a tiny 30cm circular (Hiya Hiya)

My go to favourite is a toe up sock on an 80cm magic loop needle. But there are times when a small circular needle is very handy. I do a lot of knitting at my kids sporting events and in that situation I often just need to be able to drop my knitting to attend to a particular crisis or applaud as necessary. For these times magic loop can be a bit too fiddly and more times than I care to remember, a piece of sporting kit has caught on a loop and merrily removed half the cable from my stitches. A small circular needle has much less potential for accidents and as long as you remember to push the sticthes down on the needle a bit you are usually safe from accidental unravelling.

As I do a lot of travel knitting DPNs are probably my least favourite way to work socks - simply because of the potential for loss. More times than I care to admit I have managed to lose a DPN down the side of a train seat, or I have searched my knitting bag in vain. Knowing full well that I put 4 DPNs in there, only to find that, inexplicably 1 has disappeared en route.

Whatever your preferred technique it is always good to know how to employ an alternative method should the need arise - if only to confuse the non-knitting 'Muggles'.

Socktober is coming

Louise Tilbrook Designs: Socktober is coming...

There are many reasons to get excited about autumn here in the northern hemisphere. Winter boots and black tights hide a multitude of sins and there can't be a knitter in the land that doesn't secretly relish being able to wear a handknit sweater all day without ending up as a sweaty puddle on the floor.

For the dedicated sock knitter however, these reasons pale into insignificance beside the annual event that is Socktober. A whole month devoted to knitting socks, wearing handknit socks and talking about socks. Sounds like my idea of heaven.

There are lots of KALs and events going on for this Socktober - La Bien Aimee is hosting a sock KAL for example - just search on Instagram under #socktober and you will see what I mean.

For myself I am setting a personal challenge to knit (and finish) as many pairs of socks as possible during October. A quick inventory of my projects reveals 4 pairs of socks in various stages of being finished:

A whole lot of sock toes - and not much else

A pair of vanilla socks in yarn from Countess Ablaze (35% finished)

A pair of grey striped socks for DH (35% finished)

A pair of bright Halloween socks (90% finished)

Two pairs of striped kids socks (knit two at a time) (10% finished)

My aim is to have these finished by October so that I can start November with a few clean pairs of sock needles and lots of fabulous design ideas for 2017.

What are your plans for Socktober. Do leave a comment and let me know or share a picture over on Instagram and tag me - I'm nosy like that.


The art of frogging

As a designer I have long since accepted that frogging (ie the act of ripping out one's knitting) is an essential and necessary part of the design process. There is little point in continuing along a path that you can see is doomed to design failure and it usually becomes apparent relatively soon into the design process whether that amazing idea is working out or not.

Similarly. with sample knits which have to be perfect, frogging is essential if you want a good finish. There is little point is hoping that that mis-crossed cable somewhere around the middle of the sock foot will go unnoticed in the finished photos - it won't - in fact it is bound to positively bound from the page and smack you between the eyes every time you look at it.

Frogging in my design work is a given, something to be done and got over with as quickly as possible.

A half-finished sock awaiting its fate

Frogging in my personal knitting is another matter entirely. I have on my kitchen counter a lonely half finished single sock. In a very cute project bag, but a half-finished sock nevertheless. It has been there for three weeks now and the reason? I turned the heel half an inch too soon an a toe-up sock for my DH and the resulting sock is a smidge too tight when he pulls it on.

In my heart I knew it was just too small and I had him try it on just to confirm my suspicions. 

The sock then sat on my kitchen counter for three weeks, three whole weeks waiting for me to frog it. And yes, I am aware that this also says something about my level of domestic cleanliness. For three weeks the sock mocked me, it was the first thing I saw in the morning as I put the coffee on to brew and the last thing at night as I cleared the kitchen at bedtime.

So, in a fit of organisation before work one morning I seized the sock and while my coffee was brewing I decided to deal with the errant heel.

The result? The heel was frogged, the stitches picked back up and the yarn rewound in less than 5 minutes. I had no idea why I had built it up into such a Herculean task but I was slightly embarrassed that it was so speedy in the end.

The moral of the story (I think) is that such jobs rarely take as much time as you think. Better to get it over with and then you can move on with the project. Maybe reward yourself with a cake afterwards as an added incentive? 

Afterthought heels: or the ninja skill of cutting your knitting

If you follow me on social media you will more than likely know that I'm a huge fan of the afterthought heel and indeed it is one of my favourite classes to teach. Every time I post an image on the subject though it generates a lot of comment and interest and so I thought I would do my best to summarise how I go about inserting a true afterthought heel.

There are also methods which involve knitting in a strand of waste yarn at the point where the heel is to go. This can then be removed from the sock tube and the live stitches placed onto your needles. Confusingly this may also be referred to as an afterthought heel when in fact it is really a Forethought heel - you need to know in advance where your heel is going to go. As you are merrily knitting your sock tube it isn't always possible to stop and try it on or otherwise determine where to place the heel - think crowded train carriage or dark cinema. For these and other reasons I vastly prefer the true afterthought heel.

For this you will need:

  • Your completed sock tube. I prefer to knit both socks and put in the heels at the same time.
  • 3 DPNs - I prefer wooden DPNs with sharp tips
  • 1 lockable stitch marker
  • 1 tapestry needle
  • Sharp scissors
  • Tape measure

Work out where to insert the heel

1. Try the sock on and pull it firmly up the leg. Find your ankle bone on the inside of your foot and trace an imaginary line with your finger down to the sole (underside of your foot). Mark this point with a removable stitch marker. It is normally about 2-2.5" from the back of your heel.

Start to pick up stitches for one side of the heel.

2. Take the sock off, lay it flat being sure to have the toe flat - your heel needs to align with the toe - and starting at one side of the sock start to insert a DPN tip into the first leg of each stitch from the row you have marked with your stitch marker (self striping yarn can be helpful here as, often you can follow the line of a coour change).

Work your way across, take your time being sure to pick up the leg of each stitch until you have half the number of stitches of your total sock circumference. eg. for a 64st sock I would pick up 32st. I find that wooden DPNs are easier to use as they are more flexible but this is personal preference.

Once you have 1 line of stitches picked up repeat the process on the 2nd row below your first DPN. You will end up with stitches on 2 DPNs separated by 1 row of knitted stitches.

Identify where you are going to snip

4. Insert a tapestry needle into the leg of one stitch in the middle of that row and pull it up firmly to make a loop. Take a deep breath and snip that loop. Now breathe out and slowly start to unpick the loose thread you have created on each side of the fabric.

Start to snip

5. Keep going all the way across until you have 2 DPNs each with 32 (or your chosen number) stitches on them and two curly strands of yarn at either end. These ends can be woven in later. I normally tie them in a knot with the working yarn to keep the tension even. I then untie them and darn them in at the end.

All neat and tidy

6. It happens to the best of us. During the picking up of stitches if you find that you have missed a stitch and you have one loose, just secure it with a lockable stitch marker and slip it back on the needle as you knit that row.

Use your locking stitch markers to capture any strays

Now, just reattach your working yarn and start decreasing as you would for a toe. Essentially you are knitting a 2nd toe in the middle of your sock. My preferred way of doing this is:

Rnd 1: ssk (sl 1 knitwise, sl 1 purlwise, k those 2 tog tbl), k to last 3 st, k2tog, k1. Repeat on 2nd DPN

Rnd 2: k

You may come across the odd stitch which is aligned back to front on the needle, if that happens simple knit it through the back loop to correct it.

Repeat Rnds 1 and 2 until you have decreased the total number of stitches by half. For my 64st sock this would be 2 DPNs each holding 16st. Try on the sock at this point and check the fit. If you need to do a few more rounds you can continue 1 or 2 more decrease rounds.

Finally - use Kitchener stitch to graft the heel closed, exactly as you would do a toe.

Weave in all the ends and do a happy dance in your new socks! Take a photograph to show me (tag it with #louisetilbrookdesigns)  - I'd love to see your finished heels :)


Next time: a closer look at sock toes.


My magic formula for happiness: A Toe-up sock in self-striping yarn

I am a firm believer in not messing with perfection and the first thing I want to do when faced with an amazing skein of hand-dyed self striping sock yarn is to knit it into a perfectly plain and splendid pair of socks.

My default, stress-free option is to work a pair of stockinette, toe-up socks using the magic loop technique and my beloved Hiya Hiya sharp circular needles. If they are socks for me (I wear a UK size 6 shoe) I work on the basis of 60st and a 2.5mm needle. My husband usually gets a 72st sock with a 3x1 rib on the foot and leg.

Teaching toe-up sock knitting is one of my favourite classes to teach and I created the Have Fun Socks pattern as a freebie. Both to accompany the class and to offer as a free Ravelry download to all those thinking of trying out the wonderful world of toe-up socks. This pattern uses a standard short row heel but - full confession time - if I am knitting for myself I nearly always opt for a Fish Lips Kiss Heel. Obviously I can't infringe copyright and reproduce the pattern myself but I urge anyone who will listen to me to spend the $1 required to obtain this fabulous pattern for themselves.

I have taught some fairly resistant toe-up sock knitters in my time and one of their chief bugbears is often the fact that a "normal" short row heel doesn't fit very well. The FLK heel overcomes a lot of these difficulties and the additional information provided within the pattern gives you all the information you need to fit socks to the most challenging of feet.

If you want to preserve the continuity of those perfect stripes you can work the heel in a contrast colour - or wind off 10g yarn from the skein before you start knitting the sock, to use for the heels. The latter option involves a certain amount of prior thought however, and when faced with the giddy excitement of a new skein of yarn I admit that I often overlook this step.

The only exception to my winning formula is if I am travelling or otherwise out in public, and I'm not sure when to stop for the heel. If they are for me I can usually just measure (assuming my tape measure hasn't been pilfered out of my notions bag by small boys) but often I do prefer to try them on - just to make sure the heel goes in the correct place.

In the past I have tried on a sock WIP on public transport and I can attest to the fact that this will usually generate a fair number of curious (and sometimes even horrified) looks. To avoid public shame and embarrassment I now normally take the cowards way out and just continue up the leg to knit a long (13-14") tube and put in an afterthought heel.

If this thought fills you with horror - watch out for my mini tutorial on this - next week.