The price isn't the point

“Did you know you can buy a 5-pack of socks for a tenner?”

I love how this is the response I get from some people when they ask what I’m knitting and I tell them it’s a sock. They seem genuinely puzzled, mystified even that I would be doing such a thing when they are so readily available in practically every supermarket and clothing store.

Even funnier is the implication that I am in blissful ignorance of the fact that cheap socks are indeed available. As though I would suddenly throw my knitting aside and rush out to purchase said, instantly available socks.

As a knitter yourself I know I’m leaning against an open door with this one. We know the true value of a hand-knit sock. We know that there is genuinely no comparison between a well-fitting, super cosy 75% merino wool sock and a cheap nylon ‘one size fits all’ sock. How on earth can one sock properly fit a foot range from adult 6-11 is a mystery that persists to this day. There isn’t enough stretch in the universe to accommodate that, but still sock manufacturers would try to convince us otherwise.

We don’t knit socks because they are cheap. We knit them because they are priceless

Non-knitters however truly might not appreciate the difference however until - and this is a crucial one - until they have tried the joy for themselves. Even my own dear husband, right back at the start of my sock knitting journey was a little sceptical. That might have been due to the fact that starting to knit socks had reduced me to tears on more than one occasion. It didn’t help that I started off by playing fast and loose with gauge.

The first sock I knit was so dense that it stood up by itself. More like an armour-plated bootee than a sock. I learned the hard way that knitting worsted weight yarn on 2.5mm needles was not a good idea.

Brushing off my disappointment I went all in and purchased a skein of fancy sock yarn. I didn’t realise that you were supposed to wind the skein (hank) into a ball first - I’ll leave the resulting horror to your imagination. Suffice to say that more tears were involved.

On my third time though I got lucky and I managed to produce a slightly wibbly - and pretty loose sock. The concept of negative ease was something that I grasped later on.

All this to say that sock knitting is a skill - a valuable one. And one that non knitters simply fail to appreciate. It’s not their fault of course any more than I would understand the finer intricacies of cabinet making. But I wouldn’t have the nerve to go up to a cabinet maker and tell him (or her) that they could dispense with all that woodworking malarky and simply pick up a flat pack bargain from IKEA.

The sad truth of course is that the skills associated with the handmade - especially those associated with women have long been undervalued. It has been a very long time since the men-only knitting guilds of medieval times have been a thing. Despite the prominence of some very well-known male designers the average knitters stereotype of an older woman (the dreaded Knitting Nana of shreddies fame) persists to this day. I wrote about it over on Substack publication: Everyday Knitter.

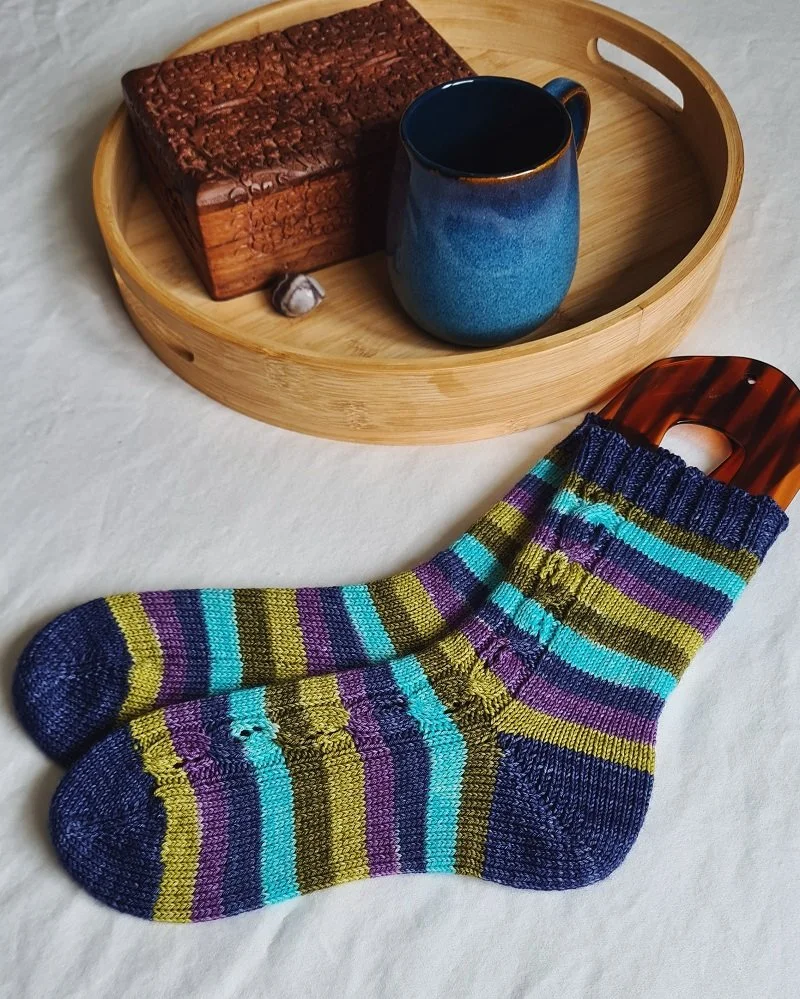
A selection of my knitted socks in daily use

Sock knitting as a survival skill

If people don’t appreciate a hand-knit sock because of the skill involved or the comfort there is always a more stark reminder.

I always think it is funny when you see people in films stocking up for an impending apocalypse. Food, water and ammunition (👀) features heavily. Textiles and antibiotics - not so much. Never mind the fact that exposure to cold or gangrene from an infected cut will kill you a lot quicker than starvation will.

Sock knitting when you think about it is the ultimate apocalyptic life skill. They might say that an army marches on it’s stomach but they can’t do much without comfortable feet. There is a reason that ‘knitting socks for the war effort’ has been such an enduring trope during the past two or three centuries.

So, this Socktober, knit on dear knitter. Grab your most colourful skeins of yarn and cast on for some glorious socks. What better way to look forward to the colder months than with warm feet for yourself and your loved ones.

Did you know I also write on Substack and host a vibrant Everyday Knitter community of like-minded crafty souls. It’s a great place for thoughtful discussion and gentle conversation. If this sounds like your thing, please just tap the link below and come take a look

Five mistakes I made as a new sock knitter

Mistakes are part of life - there is no getting away from that. But when it comes to sock knitting there are a few simple concepts that it is helpful to grasp before you pick up the needles. Why not learn from my mistakes so that you don’t have to:

  1. Not using specific sock yarn. Most sock yarn has a small acrylic component to help with wear and tear - and also to provide much needed stretch. Common blends are 75% wool/25% nylon or 80/20. Yarn with a higher acrylic component may not be as breathable and no one wants cold, clammy feet.

  2. Not realising the importance of gauge. It’s essential to get socks that actually fit and are comfortable to wear. I tried to knit socks in DK yarn on 2.5mm needles and let’s just say they weren’t a success. If armour plated booties were a thing they might have had a role.

  3. Negative Ease. It took me ages to figure out why my socks were always too big and slid off my feet. Well fitting socks need to stretch in order to hug the foot properly. This means that when you are deciding on heel placement or when to do the toe decreases, it helps to stretch the sock fabric quite firmly - not just a polite pull.

  4. Persevering with DPNs because I thought everyone used them - and not realising that other options would suit me better. There are whole host of sock knitting options available to you - from magic loop to small circulars, Flexiflips or two-at-a-time. Don’t be afraid to experiment until you find the method that suits you best.

  5. Offering to knit them for neighbours - never again!

If you take one piece of advice from this article it would be number 5. Trust me on this 😂

How to convert a sock pattern to different needles

Feel Better Socks

Most sock patterns are written with a preferred method of small circumference knitting in mind - whether that be DPNs, magic loop or a small circular needle. It is of course perfectly possible to knit socks however you chose and we all have our favourite methods.

Experienced sock knitters know how to easily adapt a sock pattern for different types of needles but there are a few tips and tricks that can help you switch methods with ease.

Regardless of how the pattern is written, the key thing to take note of is the stitch count and how those stitches are distributed across your needles. Assuming you are knitting a cuff down sock, most knitting patterns will tell you how many stitches to cast on and how many are needed to knit the leg of the sock - note that in some cases (eg with cables) additional stitches are added after the cuff in order to accomodate the tightness that cables can cause.

Once you have the stitch count - in this case we are going to use 64sts - proceed as follows:

Knitting with 4 DPNs

Divide the stitches across 3 needles 16/16/32 and use the 4th to knit with. The 3rd needle with 32sts is used to hold the stitches for the back of the leg and the heel. The other two needles hold the stitches for the top of the foot. The heel flap and turn is worked across the 3rd needle. The gusset decreases happen at each side of the 3rd needle, bringing the stitch count back to 32sts.

Some prefer to use 5 DPNs with the stitches divided as 16/16/16/16 and knitting with the 5th needle.

Knitting with magic loop

This is by far my preferred method, mainly because it makes things nice and simple. Stiches are divided equally across both needles - 32sts on each. The heel is worked on one needle. I find that this works well for more complicated patterns or cables - especially across the top of the foot - as it means you aren’t dealing with mutliple needles across a 32st chart.

Knitting with a small circumference needle

Perhaps the simplest method, although it does get a bit more complicated for the heel turn. Simply cast on the 64sts, place a marker to denote the beginning of the round and knit away. Perfect for knitting the leg - and indeed the foot. I often find though that it’s easier to transfer the heel stitches to a DPN when it comes to that part, just to make life a little easier. Some people also like to use a second small circular.

Which is your favourite method to knit with?

We all have our favourites, but having another method or two up our sleeves is always handy for when the occasion arises.

Slow starts and speedy squares

I know that conventional wisdom says January is never ending but I’m still struggling to believe it is February already. I don’t feel quite ready to emerge from my winter cocoon just yet.

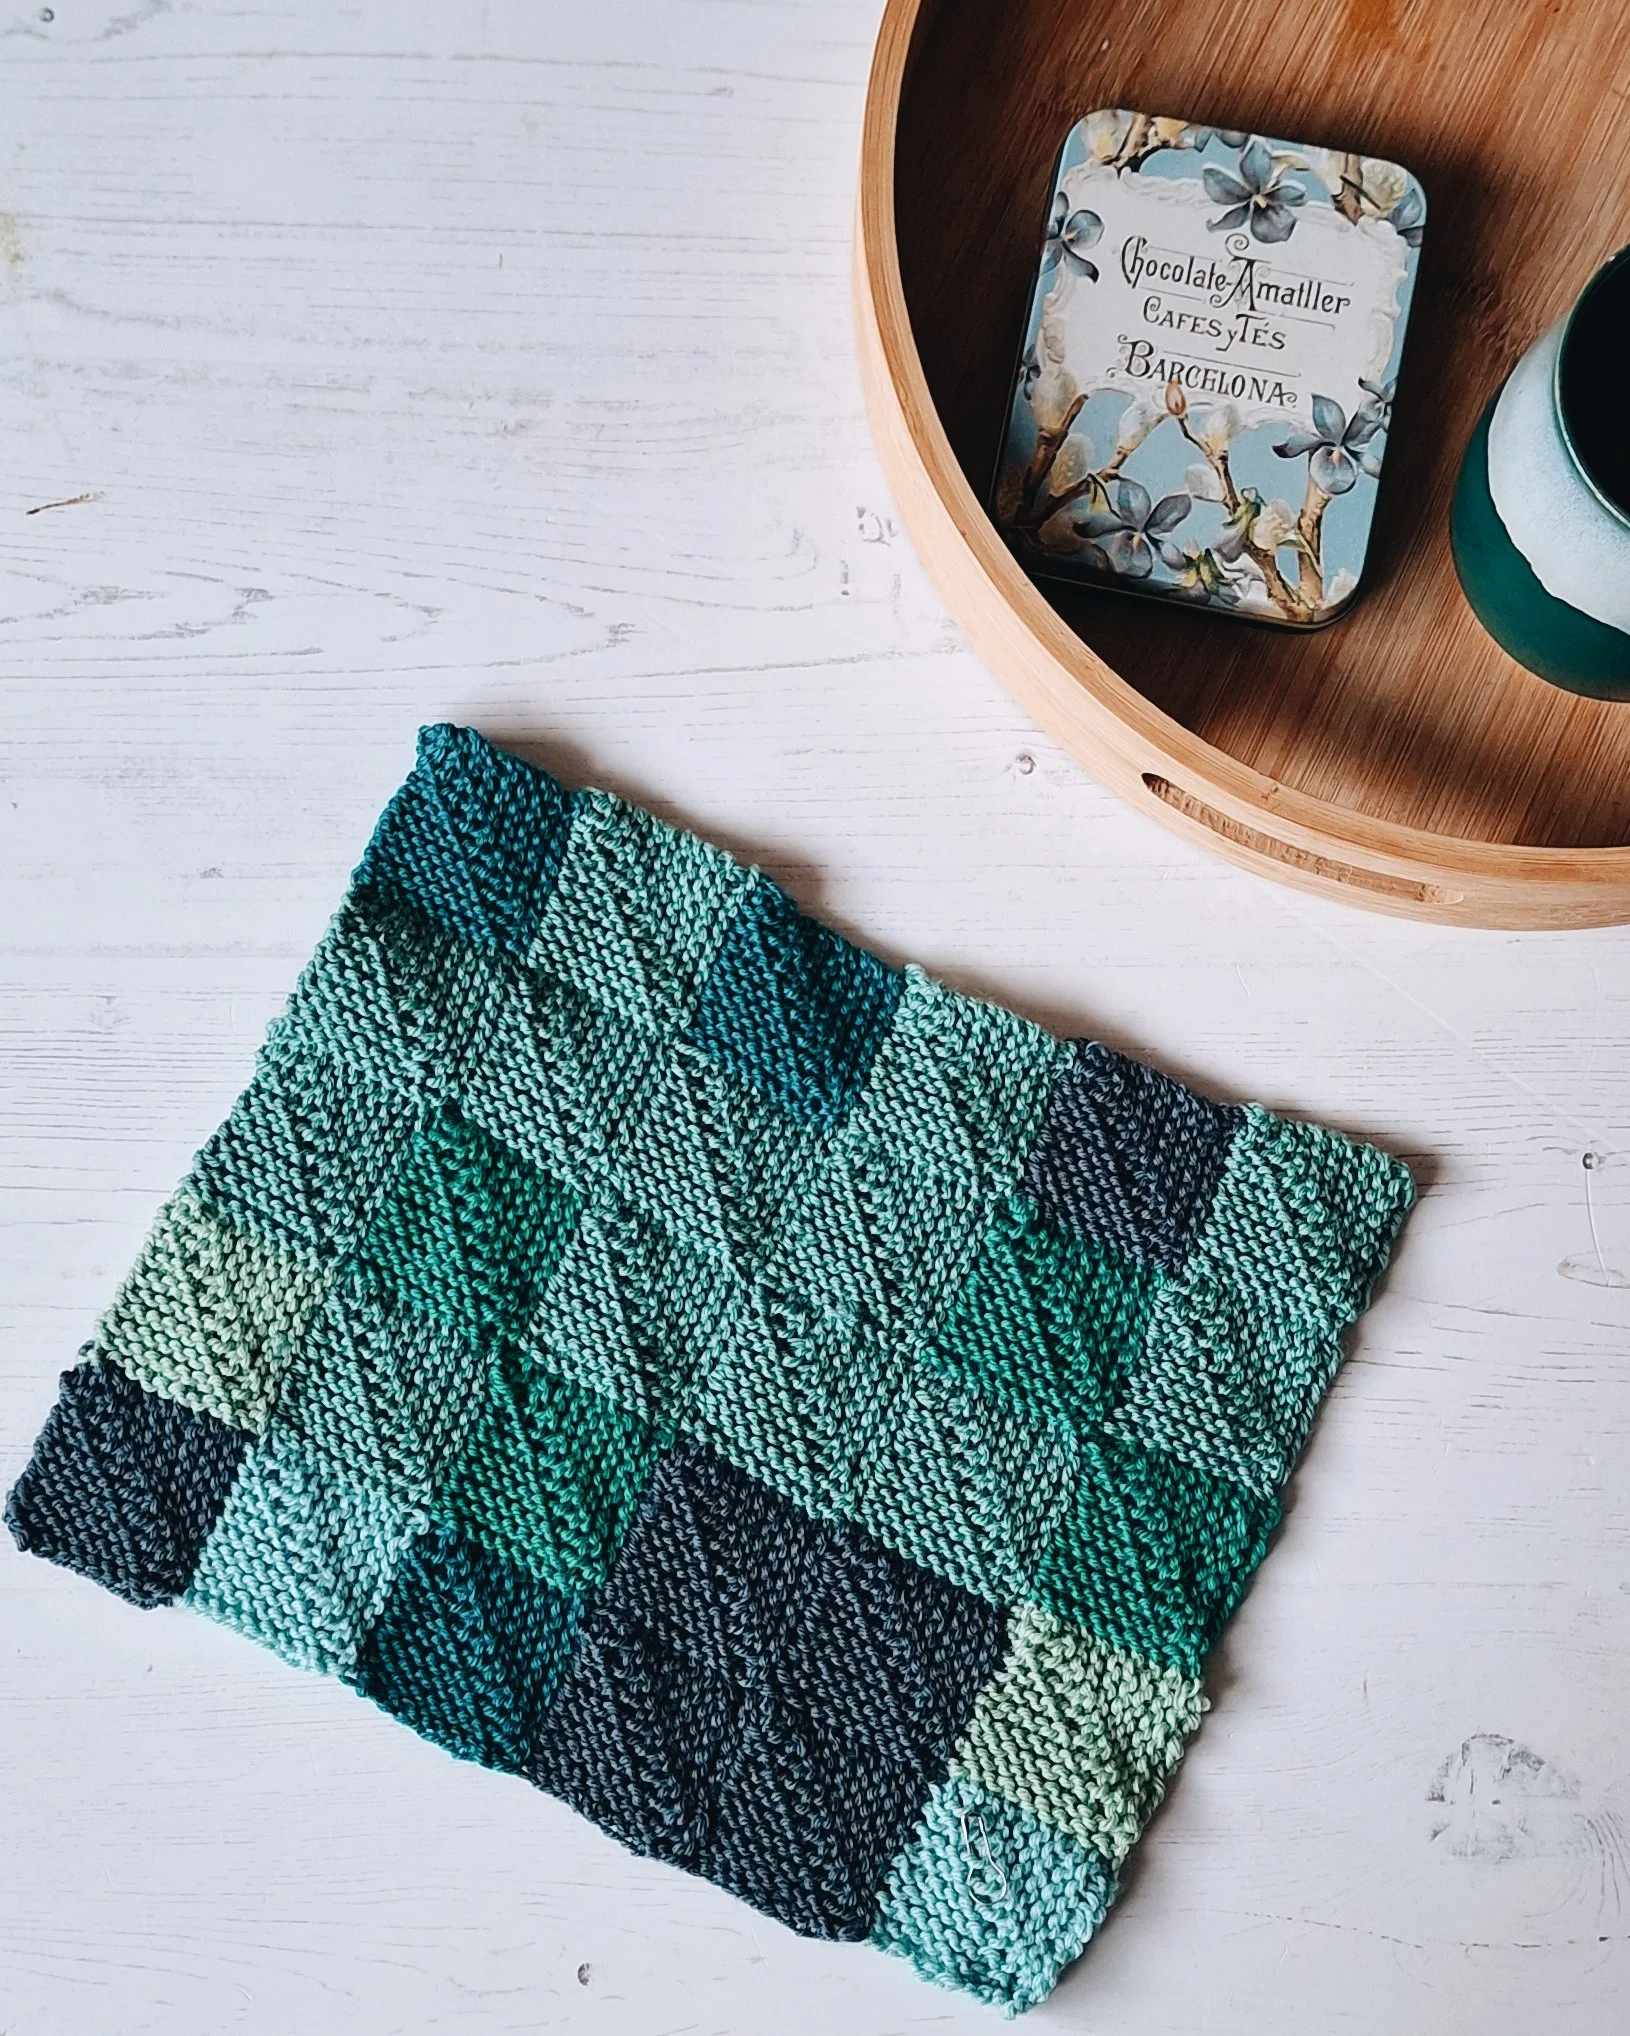
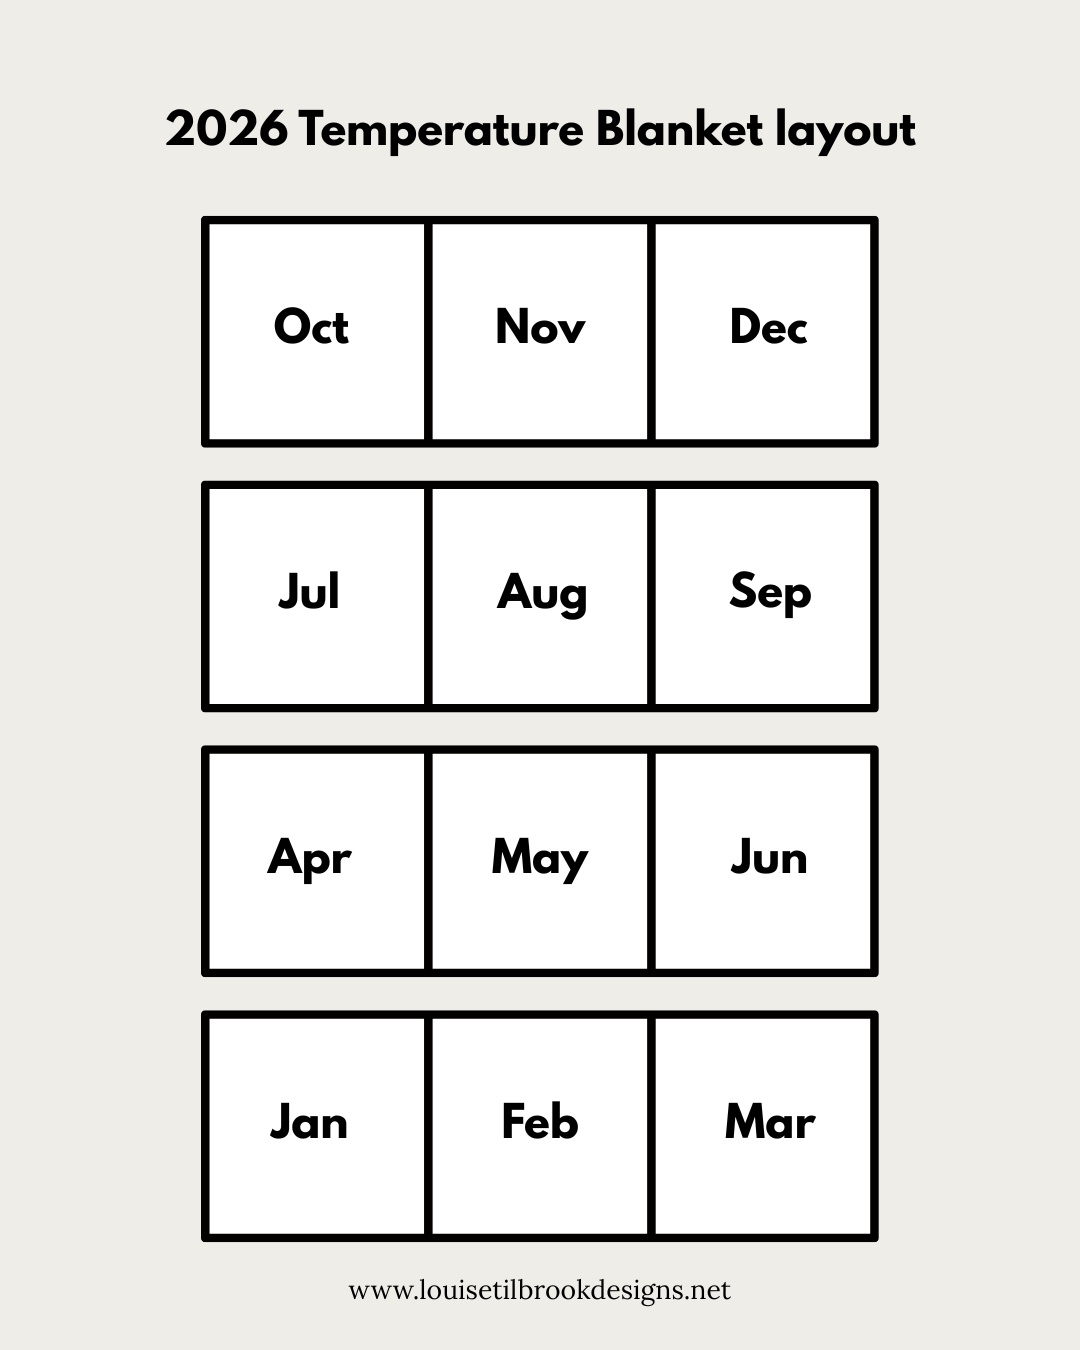
But I did want to show you the progress on my 2026 Temperature Blanket which is a kind of mash up of twin loves - Mitered Squares and Temperature Blankets.

In short I wanted to knit another year-long blanket project but I didn’t want to subject myself to any more knitting than was absolutely necessary - mindful of what happened with my 2020 project.

And so the idea of mitered squares was born - with one tiny square for each day. Much more manageable, much more achievable, much more portable.

THE DETAILS

Each square is 10 sts by 10sts with a paired central ssk/k2tog at the centre of each RS row. and takes about 10 minutes to knit (yay).

Each square measures 14.5cm (unblocked) and I am knitting each month as a panel of 6x5 squares - I’ll come up with a fudge for the non-30 day months but as luck would have it this month, the 30th/31st January were both 8 degrees (C).

Each panel is approx 27cm x 22.5cm and I think this will grow a bit on blocking.

I’m estimating that the finished blanket (arranged in 3x4 squares) will be 90cm x 92cm (36” by 36”) but I am also planning to add a border around each panel and then around the whole thing which will add to it a little more.

That’s my cunning plan anyway.

YARN CHOICE

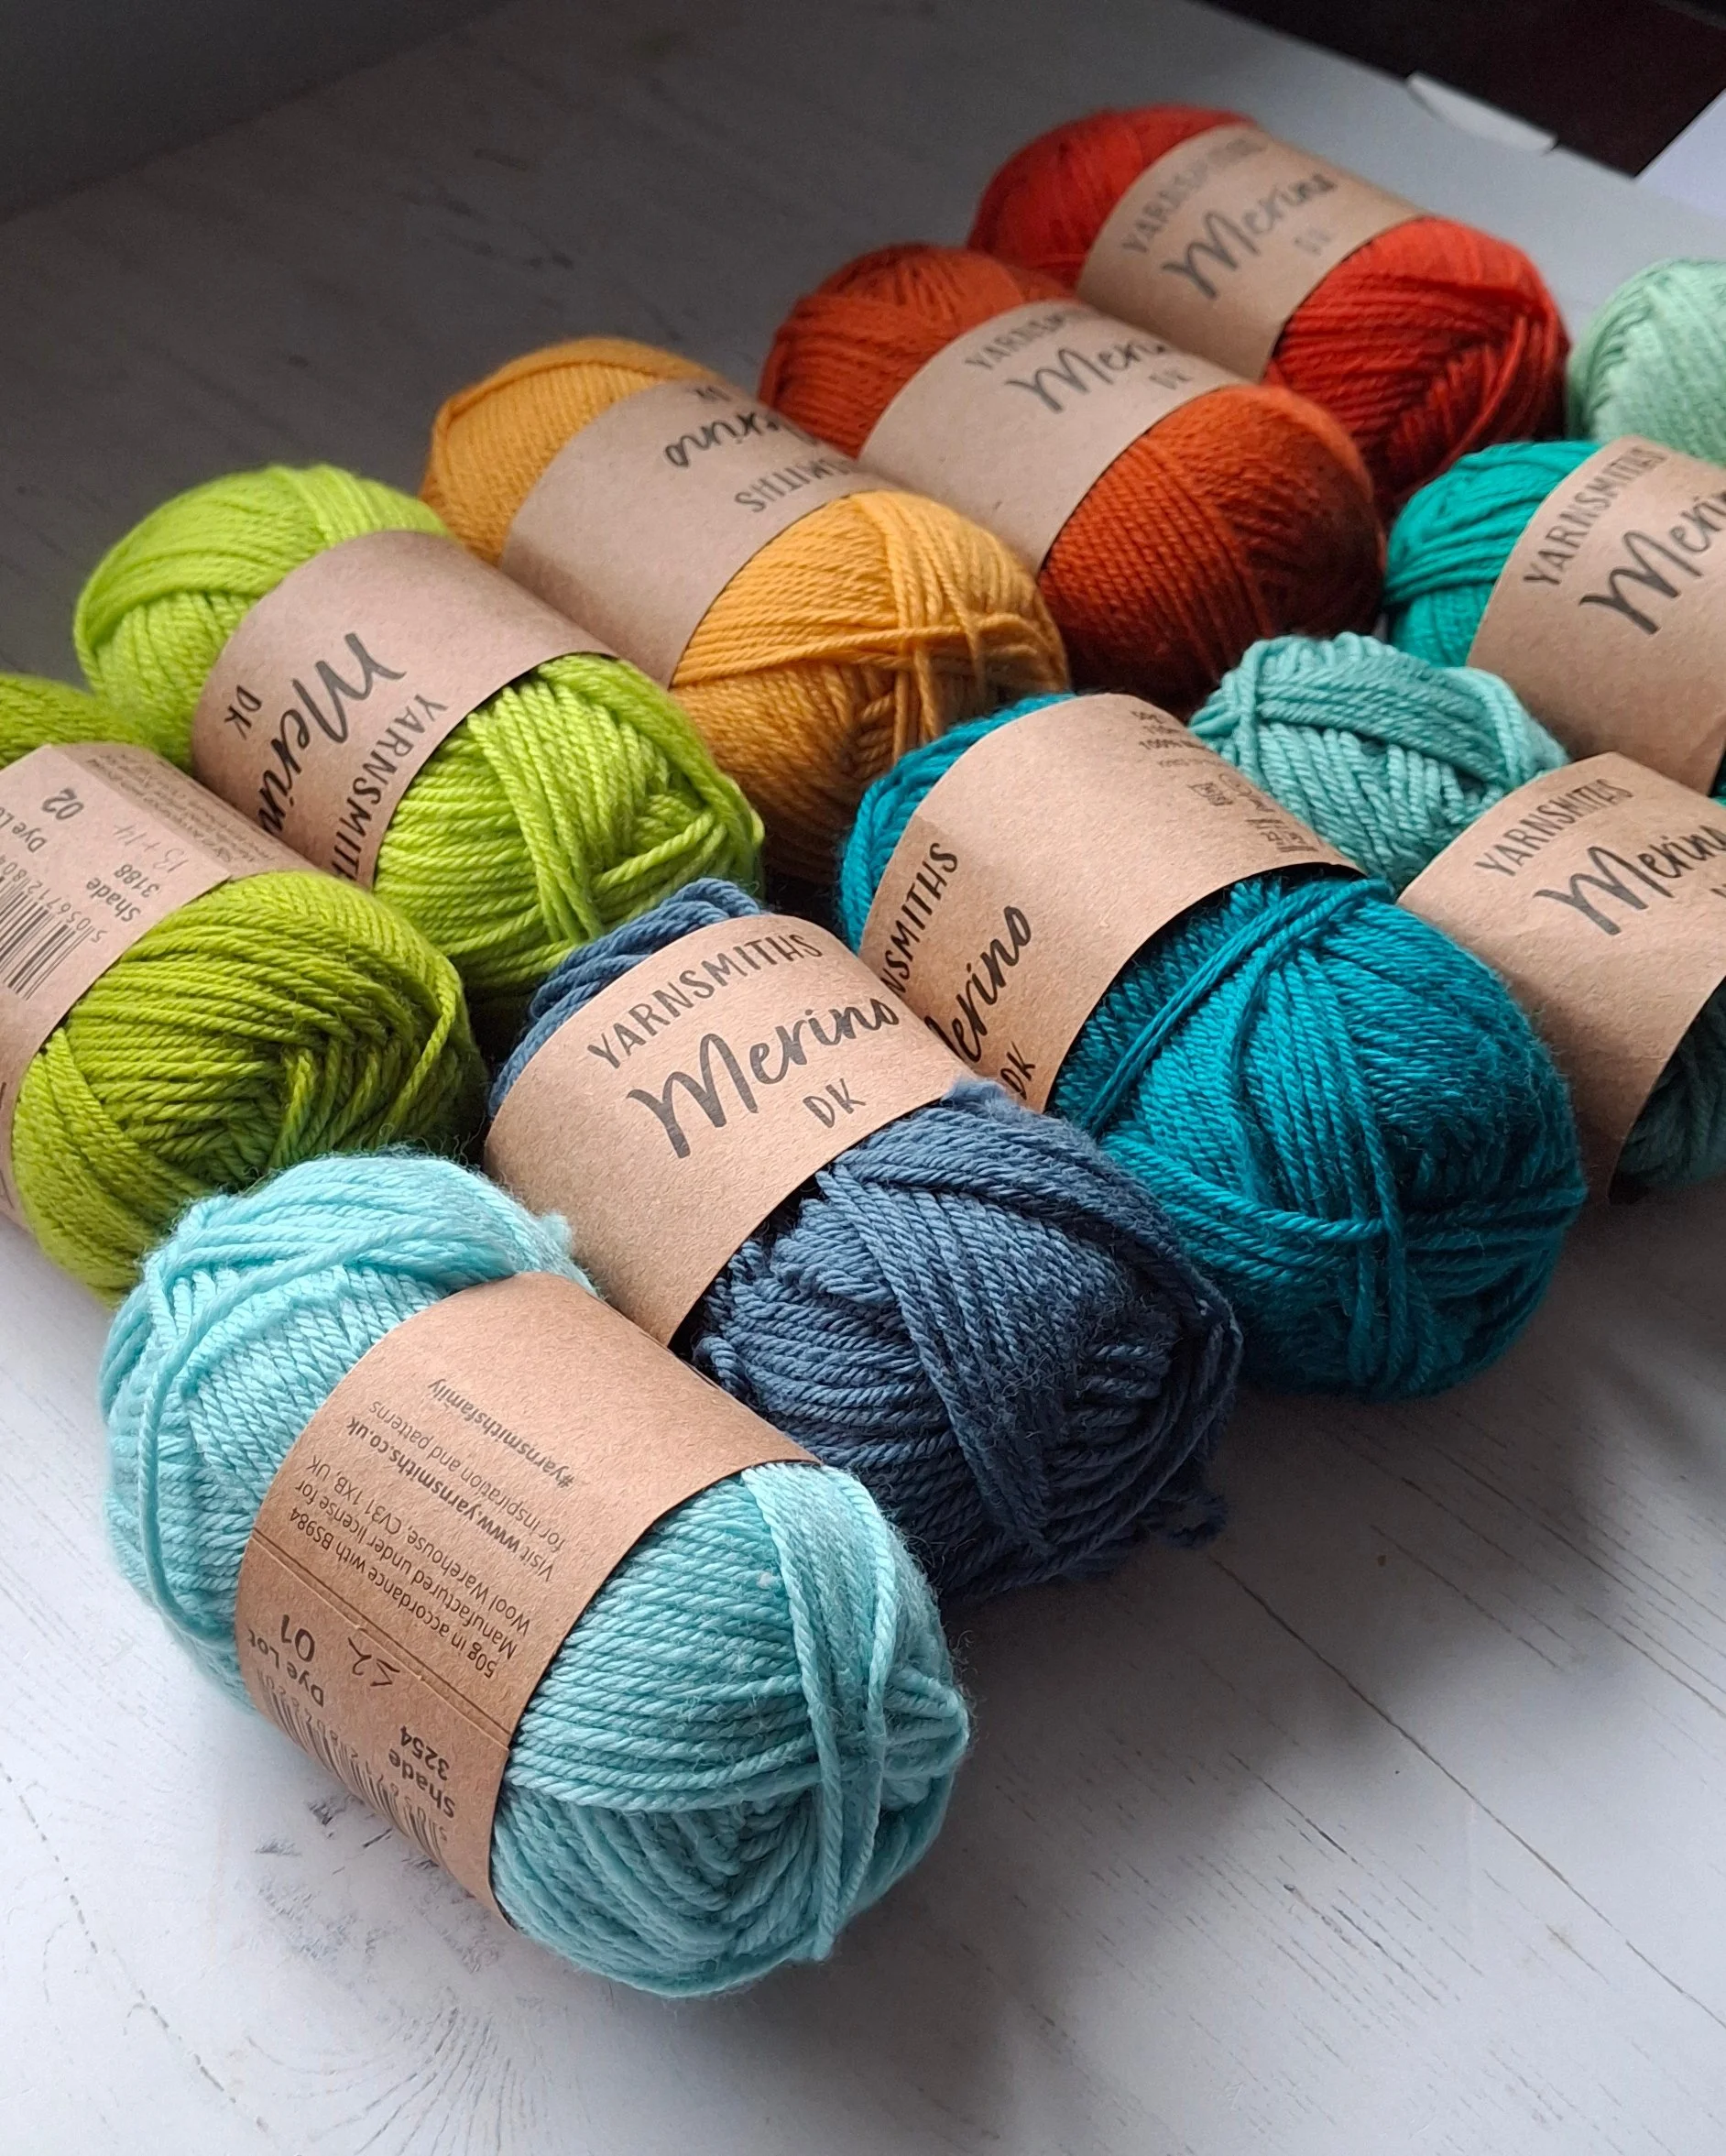
In terms of yarn choice I am using Yarnsmiths merino DKhouse.co.uk/yarn/yarnsmiths-merino-dk-superwash-all-colours which is a superwash yarn with a fabulous array of colours to choose from. It comes in 50g balls which is handy as some of the colours might not see very much use and I don’t want to have masses of leftovers (50g ball has 110m/120yds).

My scale is in 2 degree (C) increments and so far I am happy with how it is working up, although I do need to decide on some colours for the higher end - thankfully we are a few months away from needing those.

If you enjoyed this you might also like:

Temperature Blanket eBook
£8.50

As my own 2020 Temperature Blanket drew to a close I found I wasn't ready to say goodbye to it altogether. It's was quite the year - to say the least (and 2021 has continued in the same vein) and knitting this blanket gave me so much comfort and support during some very unsettling times. During the year-long project I have learned a lot and there are definitely a few things I would do differently if I ever did this again.

In essence, this e-book is the resource I wish I had, before I started.

I wanted to create a resource for those who'd like to knit their own Temperature Blanket and this 19 page e-book contains tips, suggestions and resources such as:

  • Working out a temperature scale

  • Yarn choice

  • Estimation of yardage

  • Size and gauge

  • Choosing colours

  • Ideas for construction

Like any big project the idea of starting a Temperature Blanket can seem a little daunting. Decisions on yarn, needles, colours, temperature scales etc - can all seem a little overwhelming. But the ebook is here to help and you are very welcome to join our dedicated Discord group too.

For this project I used fingering weight yarn with 3.25mm needles, however no yarn recommendations are given here - the choice of yarn/needles used is entirely up to the knitter and the type of year-long project they wish to create.


How to Knit a Sock Snake

This blog post was originally published in 2019. I have revamped it and edited slightly to take into account a few questions I received on it. If you would like a condensed version of this tutorial along with all of my handy hints and tips to knitting the perfect sock snake I have made them available as a short pattern download. The PDF is also available on Ravelry

Now, you know me - I love a bit of knitting efficiency and I like to knit socks in those spare in-between moments of travel and general hanging around. A recent long train journey meant that I got a bit carried away with the toe-up socks I was knitting. I normally knit around a 16” tube if I’m going to be adding a cuff and an afterthought heel but on this occasion I was engrossed in my Kindle, sipping my coffee and knitting away.

It was only when I got to my destination that I realised that I had in fact knitted close to 22” - practically the foot of sock number 2.

I was absolutely not going to rip out 6” of perfectly good sock so I decided to make a virtue out of a necessity and carry on to make a long sock snake. I had seen someone else on Instagram do this a while ago and the idea had stuck with me since then.

Step 1: knit your snake.

For toe-up socks (8-9” foot circumference, 4ply yarn and 2.25mm needles) I cast on 24 sts using Judy’s magic cast on - 12 on each needle - and work a standard sock toe with increases on alternate rows (to 64 sts). Then knit, and knit...and knit some more. I knit until the tube measured 31” from the cast on and then added a second toe at the other end.

Step 2: divide your snake in half and decide where you are going to snip.

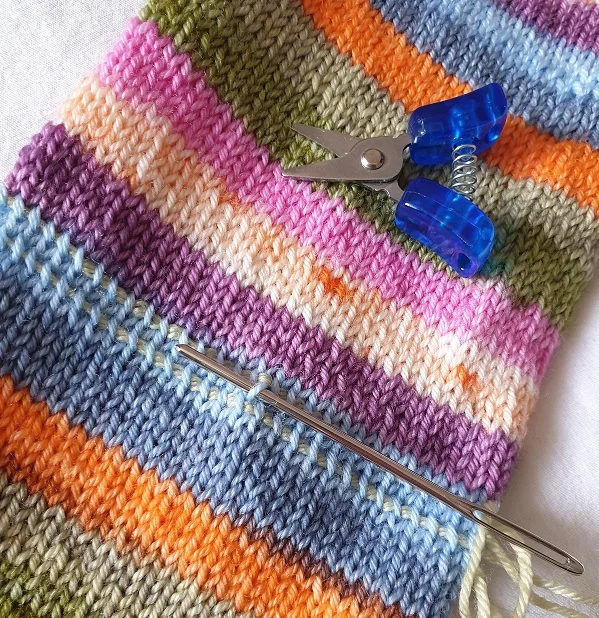
I like to fold the sock flat and pick the midway point - mark it with a pin. Then unfold it and lay it flat in front of you. Using a tapestry needle and waste yarn, slide 1 full round of stitches onto the waste yarn. Repeat with a second length of yarn - leaving one round between each lifeline

Step 3: Snip (it sounds less scary than cut)

Once your stitches are secure on your two lifelines they can’t go anywhere. Using sharp scissors - snip a stitch in between the two lines and gently unravel the yarn - I like to use the tip of the tapestry needle. Continue around the whole sock until your sock snake becomes 2 shorter snakes.

Step 4: Add cuffs

Return the live stitches to needles, join in your chosen yarn and add cuffs to the two tubes

Step 5: Add afterthought heels

Using the same lifeline process - just across 32 stitches though - add in afterthought heels.

And hey presto - 2 separate socks.

Super Sock Snake
£3.50

This is a short tutorial for a different way to knit socks two-at-a-time.
Knit a long tube with a toe at each end, then snip to separate them and add cuffs and afterthought heels.

Photos are added to walk you through the process.

And if your nerve fails you and you can’t bear to take scissors to your knitting you could always turn it into a skinny scarf or graft the ends together to make a cowl - win win!

Free version - a non-print friendly version of this tutorial can be found on my blog - here

Yarn: Sockweight/fingering weight yarn
Needles: 2.5mm


PIN FOR LATER

The Everyday Knitter Facebook Group is closing

It lasted nine years - longer than many marriages and it has been my privilege and pleasure to hold this space for you.

But sadly the group is now closed.

What happened?

A number of accounts within the group were hacked. These were most likely to have been genuine members at some point whose FB accounts were still active even though they had stopped using the app, or had died. By the way if you are reading this and don’t have two-factor authentication (2FA) turned on for your Facebook/Instagram logins please go and do it right away - LINK IS HERE

Once in the group the hackers were able to target the insecure accounts of other group members and mount an attempt to take over the group. I have an alt account there with admin rights which is the reason I still retain control. But the group is now effectively unusable as I have no way of sorting the compromised accounts from the genuine ones.

Any attempt to turn on activity leads to a flood of inappropriate comments, triggering the groups suspension.

A widespread problem

This is a considerable problem with Facebook at the moment and it is likely to get worse. It sounds dramatic but there is a concerted attempt to destabilise online communities and spread disinformation. Local FB groups and hobby groups are frequently targeted as they tend to be poorly moderated and have a high number of users with insecure accounts - for the record if you don’t have 2FA turned on your account is regarded as insecure.

Once the hackers gain control of the group - their ultimate aim is to flood online spaces with disinformation and content designed to spread hate and dissent.

Meta are fully aware and are unable/unwilling to assist.

It’s time to move on

I honestly believe that Facebook has had it’s day and this has been the final nudge I needed to take action. So, sadly as of today the group is closed.

Daily Chat Threads and WIP sharing will move to Discord - LINK HERE

All other aspects of the Everyday Knitter community will be over on Substack where I’d love it if you said hello and joined us. LINK HERE

I fully understand if you aren’t able or willing to move platforms, none of us like change after all. I have truly valued all of the friendship and support during my time running the Everyday Knitter Facebook group and I remain very proud of what we have achieved together.