bobsock instasockkal sockknitting knitting socks

BOB Socks are released

After all the fun of the #instasockkal over the past weeks I'm really pleased to say that the BOB Socks pattern in it's entirety is now available on Ravelry. It is a paid for pattern but it has already gone out as a free pattern, with my compliments to my newsletter subscribers.

If you aren't a subscriber and you sign up by August 1st then a copy will also wing it's way to your inbox. Please click here for all the details you need to know.

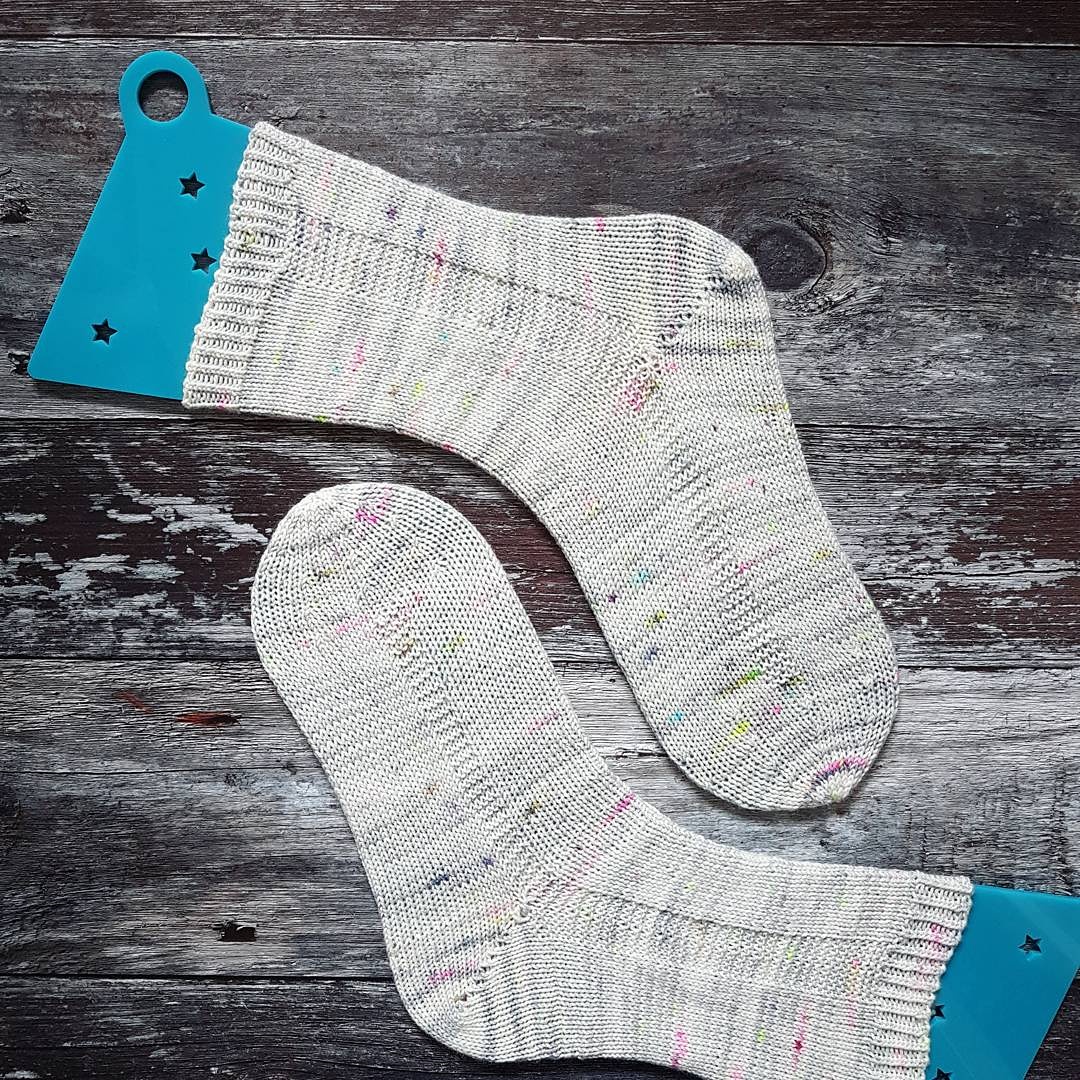
If you missed the details, this is a super easy and very customisable cuff down sock, entirely suitable for a beginner with a go-getter attitude. It cunningly avoids a heel flap and gusset by using nifty short rows and if you are averse to Kitchener stitch then this holds no fear for you. A rounded toe does away with the need for toe grafting - making for happy knitting all round.

All you need is some fun sock yarn - speckles and self stripe won't make the knitting go any faster but they certainly don't hurt.

After August 1st the pattern will revert to just having the paid for option but there will be a few additional sizes - don't worry though - newsletter subscribers will get these as well. And if you use the free download code that comes along with it, you can also add it into your Ravelry library and stay abreast of any pattern updates that way too.

BOB Sock - The Toe

With huge apologies for the delay. This 4th and final installment of the BOB Sock KAL should have been up here yesterday but my blog site and my phone have decided to stop talking to each other. I have had to bring in my laptop big guns and given them dire warnings to sort out their communication difficulties.

So, without further ado - may I present the instructions for completing your BOB Socks - by working a rounded toe.


*K6, k2tog, rep from * to end

K6 rnds

*K5, k2tog, rep from * to end

K5 rnds

*K4, k2tog, rep from * to end

K4 rnds

*K3, k2tog, rep from * to end

K3 rnds

*K2, k2tog, rep from * to end

K2 rnds

*K1, k2tog, rep from * to end

K1 rnd

K2tog to end

Break yarn and thread back through rem 8st using a tapestry needle. Pull tight and weave in end.

I would normally at this point say that your socks should be gently blocked but I'm sure I'm not the only one who likes to pull them on triumphantly parade about in them.

Or maybe it is just me....

BOB Sock - The Foot

Hello and welcome to the 3rd installment of the BOB Sock KAL.

You will be pleased to hear that it's a nice, easy one this week. All the hard work of the heel is behind us now and it's plain sailing towards the toe.

So, on needle 1 you are just continuing in the pattern as you were before, whether that's the panel of twisted rib stitches at either side of the foot or the garter stitch panels. The stitches on needle 2 are just knit plain.

Keep knitting until the length of the sock (from the back of the heel) is 2.5" short of your total foot length. Or, if you want to try it on and measure it that way, the slight stretched sock should just reach to the base of your big toe.

Next week we will work the rounded toe and finish with a triumphal non-Kitchener stitch ending!

BOB Socks - the Heel

BOB Socks: Build on The Basics socks by Louise Tilbrook Designs

The heel uses the wrap and turn method. If this is new to you, then this tutorial is well worth a look. It's a simple method but it might be worth a little practice first just to make sure you get it straight in your mind before attempting the heel. The heel is worked back and forth on needle 2, so work across the 1st 32st on needle 1, ready to start:

K31, W&T, always ensure wrapped st is slipped back to right hand needle, turn work.

P30, W&T

K29, W&T

P28, W&T

Keep going in this fashion - working 1 less st each time (to 1st before the last wrapped st)

The final row is P10, W&T. You will have 10 central sts and 11 wrapped sts on either side. For the 2nd half of the heel you will work back across each of these wrapped sts, wrapping them again.

K10, k 1st wrapped st (pick up wrap and knit it together with that st), wrap next st (this will now be double wrapped) and turn.

P11, p 1st wrapped st (together with its wrap), wrap next st and turn

K12, this will take you to the first double wrapped st, pick up both wraps (from bottom to top) and knit them along with the st, wrap next st and turn

P13, pick up both wraps (from the front, bottom to top) and purl them along with that st, wrap next st and turn.

Cont in this manner, work until 1st double wrapped st, pick up both wraps from front of work (bottom to top) and work with that st, wrap next st and turn.

Continue until all st have been worked and you are ready to commence working in the round again.


Early morning knitting

In the great scheme of things I know that British summers are a bit of a joke in general. Once the temperature stays above 25 Celsius for a few days we generally all start to be a bit limp and secretly longing for cooler days. To other countries this is generally quite amusing but once you bear in mind our almost universal lack of airconditioning - in all but the nicest and most modern buildings, then hopefully we might seem a bit less like a nation of whingers.

Anyway, heatwave or not the knitting must continue. I'm quite glad I chose socks for my first #instakal rather than a shawl as socks are ideal for even the hottest of weathers. I use metal Hiya Hiya needles and so if my knitting gets a bit hot in my hands I can just set them down for a few minutes and they cool right off. If things are really hot and sticky I just bung the knitting in the fridge for a few minutes and that does the trick nicely. Luckily my family are a very tolerant lot in general and no one minds in the least opening the fridge to find my project bag sitting on top of the cheese!

So, this morning sees me up bright and early - getting in a few rows before the house wakes up. Just me, my knitting and of course, my coffee. I'm powering on towards the heel as I want to get the directions for next weeks installment ready and tested before the weekend.

I'm so enjoying seeing everyone's progress on Instagram. When you have a minute be sure to browse the hashtags #instasockkal and #bobsock for some great inspiration.


The BOB Sock KAL starts here

When casting on for a cuff down sock I prefer to work 1 row flat before joining to work in the round - to reduce the risk of accidental twisting. Using long tailed cast on, cast on 64 st onto your circular needle.

Set-up: k1tbl, p1 to end.

Join to work in round, being careful not to twist and place marker to indicate beginning of round. Work in twisted rib (K1tbl, p1) to end, until cuff measures 1.5” from cast on edge.

For the original Bob sock I knit the first and last 4 stitches of each needle in twisted rib - for this second version I chose to work them in garter stitch - you can of course just knit these plain if you prefer.

Leg: Ribbed panel option

N1: (k1tbl, p1) x 2, k24, (k1tbl, p1) x 2 N2: repeat as for N1

Work each rnd exactly the same until cuff measures 7” (or desired length) from cast on edge/

Leg: Garter panel option

Rnd 1 N1: p4, k24, p4 N2: repeat as for N1

Rnd 2 N1: k all st N2: repeat as for N1

Repeat these two rounds until cuff measures 7" from cast on edge.