Super Sock Snake

This blog post could also be titled “How to Knit a Sock Snake” - or indeed -why you would want to do such a thing.

Now, you know me - I love a bit of knitting efficiency and I like to knit socks in those spare in-between moments of travel and general hanging around. A recent long train journey meant that I got a bit carried away with the toe-up socks I was knitting. I normally knit around a 16” tube if I’m going to be adding a cuff and an afterthought heel but on this occasion I was engrossed in my Kindle, sipping my coffee and knitting away.

It was only when I got to my destination that I realised that I had in fact knitted close to 22” - practically the foot of sock number 2.

I was absolutely not going to rip out 6” of perfectly good sock so I decided to make a virtue out of a necessity and carry on to make a long sock snake. I had seen someone else on Instagram do this a while ago and the idea had stuck with me since then.

So many people asked about it that I said I would write it up as a short tutorial and so if you’d like a copy of this tutorial - you can find a PDF of it on my Payhip site.

Step 1: knit your snake.

For toe-up socks (8-9” foot circumference, 4ply yarn and 2.25mm needles) I cast on 24 sts using Judy’s magic cast on - 12 on each needle - and work a standard sock toe with increases on alternate rows (to 64 sts). Then knit, and knit...and knit some more. I knit until the tube measured 31” from the cast on and then added a second toe at the other end.

Step 2: divide your snake in half and decide where you are going to snip.

I like to fold the sock flat and pick the midway point - mark it with a pin. Then unfold it and lay it flat in front of you. Using a tapestry needle and waste yarn, slide 1 full round of stitches onto the waste yarn. Repeat with a second length of yarn - leaving one round between each lifeline

Step 3: Snip (it sounds less scary than cut)

Once your stitches are secure on your two lifelines they can’t go anywhere. Using sharp scissors - snip a stitch in between the two lines and gently unravel the yarn - I like to use the tip of the tapestry needle. Continue around the whole sock until your sock snake becomes 2 shorter snakes.

Step 4: Add cuffs

Return the live stitches to needles, join in your chosen yarn and add cuffs to the two tubes

Step 5: Add afterthought heels

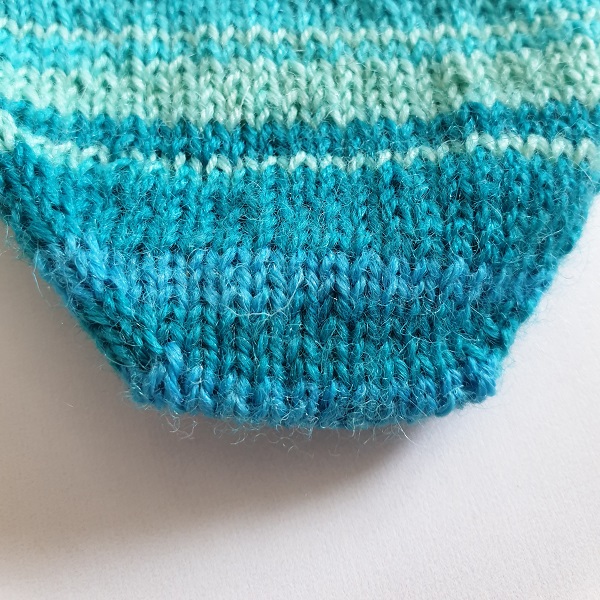
Using the same lifeline process - just across 32 stitches though - add in afterthought heels.

And hey presto - 2 separate socks.


PIN FOR LATER

Love your LYS

This article was previously published in May 2018

In the face of the relentless encroachment of online shopping and the large commercial companies all using their considerable resources to vie for our attention, it’s easy to feel powerless in the face of it all. So much is made of the convenience of online shopping, the speed and the price that it's easy to just shrug your shoulders and go with the flow.

But even the snazziest of websites, with all their glossy photos and shiny banners can’t hope to compete with the sensory overload that is a yarn shop. As knitters and crafters we are tactile creatures. Never more at home than when using our senses to see, touch, smell and even listen to yarn. Don’t laugh - don't tell me you don’t love the pleasing crunch that a rustic tweedy yarn makes when you squish it between your fingers?

Such is the effect of a yarn shop that many knitters will simply stop on crossing over the threshold and take a moment just to look around and let their senses acclimatise to the dazzling array of colours and textures on offer.

Now tell me the last time that buying from a website made you feel like that. Did your heart skip a beat as you opened up the web page. Did you pause to appreciate the joy as you clicked the checkout button? I very much doubt it.

It’s important to note that I make an exception in this to online shopping with indie dyers such as Countess Ablaze and Eden Cottage Yarns. Both of these yarns I rarely get to meet in person so online shopping really is the next best thing to plonking myself down in their studios for a cup of tea and a yarn squish.

As well as the sense of community that a yarn shop can foster - the classes, the expertise and help available, the knitting groups and just the sheer joy of being around like minded people and it’s clear that buying yarn online is a very poor relation.

Now I know there are times when it just isn’t possible to buy yarn in an LYS. Not every town has one for a start or it may not stock what you need. Difficulties with transport, with access and choice can all play a part and leave you reaching for the mouse instead.

But when you do, as we all do from time to time please bear in mind that you have a choice over where you spend your hard earned money. Unlike with book buying online (where Amazon has pretty much annihilated the competition) the same isn’t true - yet - of yarn shopping.

You could chose to click on one of those well known online yarn giants whose well placed Google Ads fall so conveniently at the top of the search screens. Or you could choose to scroll a little and shop online from one of the many UK LYSs who have fabulous websites and offer a great alternative online shopping experience.

After all, it may not be a yarn shop local to you but it is still local to someone else. And even if the small independent yarn shop is solely online (as opposed to being a bricks and mortar shop) your money will still go into the local economy where that small business is based.

Just as convenient - you can still shop for yarn at 10 pm in your PJs. Just as easy - modern websites and payment systems means that even the smallest of LYS can invest in a slick purchasing system and in a few clicks that yarn can be on it’s way to you.

The difference is that you will have the peace of mind that knowing you have supported a real person, a real small (often family run) business. A real LYS that doesn't have the advertising budget to compete with the “big box” stores but which still very much has a valuable service to offer.

So, as it is Yarn Shop Day this coming weekend, wouldn’t it be nice if we didn’t need a special day to remind us. What if every day was an LYS Day - where we make a conscious choice to support our LYSs - even if they are miles away from where we live.

How to avoid 'ears' on toe-up socks

An ‘ear-free’ sock toe

It’s such a tiny thing to worry about in the greater scheme of things, I know. But if you’ve ever been annoyed by that tiny sticky-out ear that you sometimes get when you start a sock toe, then this tip might help you.

I’ve been starting socks this way for so long that I can’t remember where I heard it first. It might have been either via Paula of the Knitting Pipeline podcast, or Susan B Anderson - both fabulous sock knitting gurus.

It’s ludicrously simple to do - you just need to unlearn the first piece of advice you were ever given as a new knitter and don’t start with a slip knot. It is this tiny knit which sticks out in the fabric, no matter how tightly you try to pull it and gives that annoying little lump on the very outside part of the toe.

Don’t use a slip knot when casting on

Instead of tying a slip knot, just drape the yarn over the needle and then arrange the yarn as you would do normally for a Judy’s magic cast on - yarn tail over index finger and the end nearest to the yarn ball around your thumb.

You might find it helpful to give a twist to the yarn before you start casting on - just to anchor it and give you something firmer to knit into on the first row. But once you’ve got that first fiddly stitch into the loose loop out of the way it’s plain sailing.

No, tiny knot and no annoying sock ears!

Do give it a go and let me know what you think.

PIN FOR LATER


Of socks and mice...

Precious Metals Socks - photo by kind permission of Anna-Maja (agrajag42 on Ravelry)

Sometimes I think I should really write a book - Tales of a Hapless Knitter perhaps.

Let me set the scene. A freshly washed and blocked pair of socks ready to be photographed for their moment of Ravelry stardom. They are also on a freshly washed clean white duvet cover but let’s ignore that for now. Our hapless knitter pops out for groceries and returns intending to take the necessary photographs and get her sock pattern up on Ravelry pronto.

Imagine the wails of dismay when she sees the carnage that has ensued in her absence. A certain black and white cat who goes by the wholly feminine and unsuitable name of Blossom, has brought her latest rodent find into the bedroom and proceeded to use said socks as a tablecloth for her feast.

I’ll spare you the sight but use your imagination on this one. It’s safe to say that a photo of the scene wouldn’t entice anyone into buying a sock pattern, not unless they have a particular interest in rodent anatomy.

But never fear, my lovely email subscribers are fellow KAL-ers came to the rescue with offers of project photos (as well as sympathy for the damaged socks). Thanks to their kindness the pattern is now up on Ravelry for your purchasing pleasure, without a hint of rodent massacre.

So this pattern is brought to you almost literally by blood, sweat and tears - and also the lovely photo taken by Anna-Maja (agrajag42 on Ravelry)

You can find the Precious Metals Socks pattern here - and you’ll also find a chastened cat banished to the kitchen,

Stripy socks and a celebration

That feeling of new socks never gets old does it?
No matter how things are going or how bad your day, you can pull on your freshly finished pair, wiggle your toes and feel instantly so much cheerful - and not a little bit smug.

I knit these as a long sock snake with a toe at each end, and then snipped to add cuffs/heels. After lots of questions on the way I did these I’ll be doing a blog post on it later in the week but for now you can hop over to my Instagram Stories highlights where I’ve saved a short photo tutorial for you.

It also seems appropriate to wear new socks for the launch of my new Comfort Blanket KAL today. You can find all the details here but basically this is an 8 week KAL combining pattern ideas/recipes for a Mitered Square blanket with self care tips and suggestions along the way.

If that sounds right up your street or you are in need of #ablankettohideunder please do think about joining us, and if you have any questions fire away. I’d love to have you on board.

Comfort Blanket KAL

Well, that escalated quickly.

So many of you were so enthusiastic about me running a Comfort Blanket KAL that I dived in with both feet and have now got the pattern page up on Ravelry and ready for your purchasing pleasure.

For a serial prevaricator like me you’ve no idea how unusual this course of events is. I can dither for weeks sometimes before hitting the Ravelry publish button.

The KAL kicks off on Monday 8th April and will run for 8 weeks, but please don’t worry. I’m not expecting you to knit a blanket in 8 weeks, I promise.

Each Monday, you’ll get a pattern update on Ravelry and it will alternate between a pattern for a particular mitered square, and self-care tips and suggestions. On Ravelry at the minute there is a pre-KAL Information sheet available for download after purchase. That just sets out the key dates for your diary and gives you a bit more information on the closed Facebook group for the KAL and some basic information on yarn/needles.

If you’d like to find out more I’ve summarised it HERE

And if you are ready to jump in and join me for the most gentle of KALs - just click HERE

Any questions? Just drop me a quick email and I’ll get back to you as quickly as I can.