blanket

A log cabin blanket with a difference

I do love a good traditional log cabin blanket but sometimes it's nice to switch things up a little and I found myself wondering whether I could combine my twin loves of log cabin and mitered squares. 

And it turns out that you can.

The Log Cabin-ish blanket uses a series of blocks constructed in the traditional log cabin style but rather than each round of blocks overlapping at the corners, this leaves the corners free to be joined with little mitered squares.

Using a yarn with colour contrast adds visual interest and makes for something a little bit different.

This blanket is sized to create a small lap-sized or baby blanket (approx 37" square) but it could be easily sized up if you have sufficient yarn. The beauty of log cabin blankets is that you can just keep going until your yarn supply - or patience - is exhausted.

As ever, the pattern is available to buy through my Payhip store at the link below. If you would like a copy for your Ravelry library please just email me at the address in the footer of the pattern and I can sort that out for you.

Spring Blanket KAL

20210224_163707.jpg

A design so new that it doesn't have a fancy name yet.

I've been firing on all cylinders since casting on with this gorgeous spring-like yarn from Ewe and Ply and the lap blanket is growing nicely. 

I've decided to run a 4-week long knitalong during March for this new design - something fun, cosy but not too challenging. No one needs to be wrestling with cables or counting on charts right now.

I'm launching the KAL today on March 1st appropriately enough with the pre-KAL information, on Payhip and there will be 4 weekly updates after that.

So what is it?

It's a DK weight lap-blanket, although worsted or aran weight would also work well. It's knit flat in a single piece with no seaming or finishing required other than weaving in of ends - and if you use a woolly yarn and spit-splice it even that is minimal.

The idea behind the blanket is a gansey-style series of patterns. Knit in bands and interspersed with stocking stitch. Each week will be a different stitch pattern to work on. 

Blankets knit flat get a bit of a reputation for being boring to work on, and I'm certainly guilty of preferring to knit them in the round, or corner to corner. But something about the different bands of stitch patterns definitely breaks it up and helps to avoid boredom.

The approximate finished size of my blanket is a 40" square but this is obviously customisable based on your requirements and the yarn you have available.

You can find all the details you need at the link below along with where you can buy the pattern. And of course, if you have any questions please just let me know

Boundaries Blanket

I feel as though the alternative title for this should be “How to photograph a blanket”.

No matter how much I try for ‘artfully draped’ I always seem to end up with ‘randomly dropped’. No one wants to see a blanket stiffly stretched out like a body on a slab but equally, it’s hard to show ‘casually rumpled’.

Anyway, I just wanted to let you know that although the Boundaries KAL is now at an end, the whole pattern in a condensed version is now available to purchase through Ravelry. There are 12 squares in total which are knit separately and then seamed together. I would normally at this point say that the squares are handy portable projects - ideal for keeping in your handbag - but if you are anything like me you haven’t used your handbag for weeks.

For the next few days - until May 1st - there will be an early bird discount of 25% on this design. Just use code Boundaries at the checkout.

And, although the KAL has ended, the Facebook group we set up for it is still running. If you would like to join - to see what the squares looked like in progress or just to hang out there as you knit - please PM me on Ravelry with the email address you used to purchase the pattern and I’ll add you in.

Knitting with yarn held double

Some time ago, despairing of a never-ending mountain of leftover sock yarn, I knit a mahoosive ripple blanket holding 3 strands of 4ply together.

The resulting blanket is now a much loved snuggly staple in our house and usually lives casually thrown over the back of the sofa for anyone who needs it.

Knitted on 7mm needles and using over 4000m of yarn it knitted up surprisingly quickly and also made a pleasing dent in my stash.

Knitting with yarn held double or triple offers many advantages, not least the size reduction to your stash. Combining yarns of different colours, textures and even weights can produce some really beautiful fabrics that just wouldn’t be possible with just one yarn. And even better, they will be totally unique to you.

I love the marled effect you can get by combining colours - indeed I think that’s the favourite thing about this blanket of mine. And even now I can spend many a happy minute studying it and remembering the original yarns that went into it.

Some Tips: 

Swatching - yes I know - but even a little swatch will be helpful in making sure that you get a fabric you like. Technically speaking 2 4ply yarns held together should yield a DK weight but I know that in my hands at least, I get more of a worsted weight gauge. The way the yarns are spun and they way they wrap around each other during the knitting can all affect the final result. If you are planning a marl or a fade it’s always a good idea to do a little swatch first just to check that the colours play nicely together.

Winding - this is a personal one. Some people prefer to knit with the two strands coming from separate balls, some prefer to wind it into a single large ball before starting. This probably comes down to personal preference and how much you dislike tangling. If I was knitting from 2 or 3 balls I’d probably keep them separate (it also makes it easier to swap in new colours) but if I was knitting from 5 I’d have to wind it into a monster ball first.

Joining - again this is down to personal preference. With my Garter Ripple Squish blanket I used the clasped weft join to add in new colours as I wanted to and just weaved the ends in later. There is also the option to embrace the ends and go for a fringed effect if you are using up lots of odds and ends.

Ravelry - did you know that Ravelry now gives you the option to search for projects with multiple yarn strands. If you look down the search options on the left hand side you’ll see a box for ‘yarn held together’ and various options under that. This is a relatively new addition but I’ve found it to be really helpful.

As with so much in knitting, when it comes to knitting with yarn held doubled it really does come down to trial and error and finding something that pleases you - it’s great to look at other projects for inspiration but ultimately you are free to go your own way and create something truly unique.

A tale of two blankets

Top: knitted mitered square blanket, Bottom: crocheted granny square blanket

A tale of two blankets

Both are sock yarn blankets and both are well loved. 

But the crochet one took a fraction of the time (about 3 months vs 3 years) and weighs a heck of a lot more. I haven’t done the exact maths but my knitted mitered square blanket weighs about 400g (that’s approx 1600m sock yarn). The crocheted one is a bit smaller in size and weighs over 650g (well over 2500m sock yarn)

As much as a mitered square blanket will always be my first love there's no denying that a crochet blanket is a speedier way to work through my leftovers. I know that there is some debate on whether crochet does actually use more yarn than knitting but at least in my experience, the giant crochet granny square has freed up a lot more space in my leftover yarn drawer than the mitered square one ever did.

Just to seal the deal further I’m now contemplating a crochet blanket holding yarn double for even more stashbusting potential.

Our February theme for the Stash Appreciation Society is going to be holding yarn double/triple so I think I'm going to have to give this a go - in the interests of scientific research if nothing else.

If you are interested in what we are up to in the group you can find out more information at the link below - or just pop me a question.

How to knit a Temperature Blanket - and why...

Far too much dithering over colour choices

January 2021 Update: You can find the update and the completed blanket at this post

And you can find my Temperature Blanket e-book here:

I swore that I would never do a Temperature Blanket and yet every January I would be smitten with gorgeous finished objects, fantastic visual representations of the past year in woolly form and be tempted. This year finally got the better of me and I decided to embark on my own.

If you don’t know what I’m talking about a Temperature Blanket is a year long project (usually) where you work a row or two every day.

You decide on a temperature scale and have a different colour to represent each category on that scale. For example I decided to work on a scale of 0-30 degrees Celcius, with the scale in 3 degree increments.

The important thing to note from the outset is that this is your project and you set the rules. There is no standard pattern, although others have published their projects for inspiration and education ultimately your choice of yarn/needles, your selection of colours and scale will make this project completely and utterly unique. That’s the beauty of it.

However, like all epic projects it does require some planning at the beginning. It won’t have escaped your notice that 365 days is 365 rows (or 730 for garter stitch). That is a lot of rows and in chunky yarn (or crochet) you could well end up with something the length of a hallway runner rather than a usable blanket if you aren’t careful.

Scale

Another consideration is the selection of your scale. This is obviously highly dependent on where you live. Based here in the UK we are blessed with a pretty moderate climate without significant extremes. My scale therefore can be in relatively small increments. Doing it in increments of 6 for example might result in too few colour changes to look visually interesting. Many days in summer here can be in the range 18-24 for example.

Colours and yarn

Pick a yarn you love, obviously and that fits your budget. It’s also worth bearing in mind that you might need to buy more if your estimates are off, so pick something that’s readily available and easy to obtain. It sounds obvious but you don’t have to go for the traditional blue = cold red = hot colour scheme. I’ve seen some brilliant ones where the colours are neutrals (greys or shades of natural yarn) for example that look absolutely stunning.

Time

How you pick and record the temperature is also entirely up to you. I decided to go for noon at our favourite place in the Lake District - I check it daily on a weather app. You could also access a historical weather record site for your area and do a retrospective blanket - based on a significant year for you, for example.
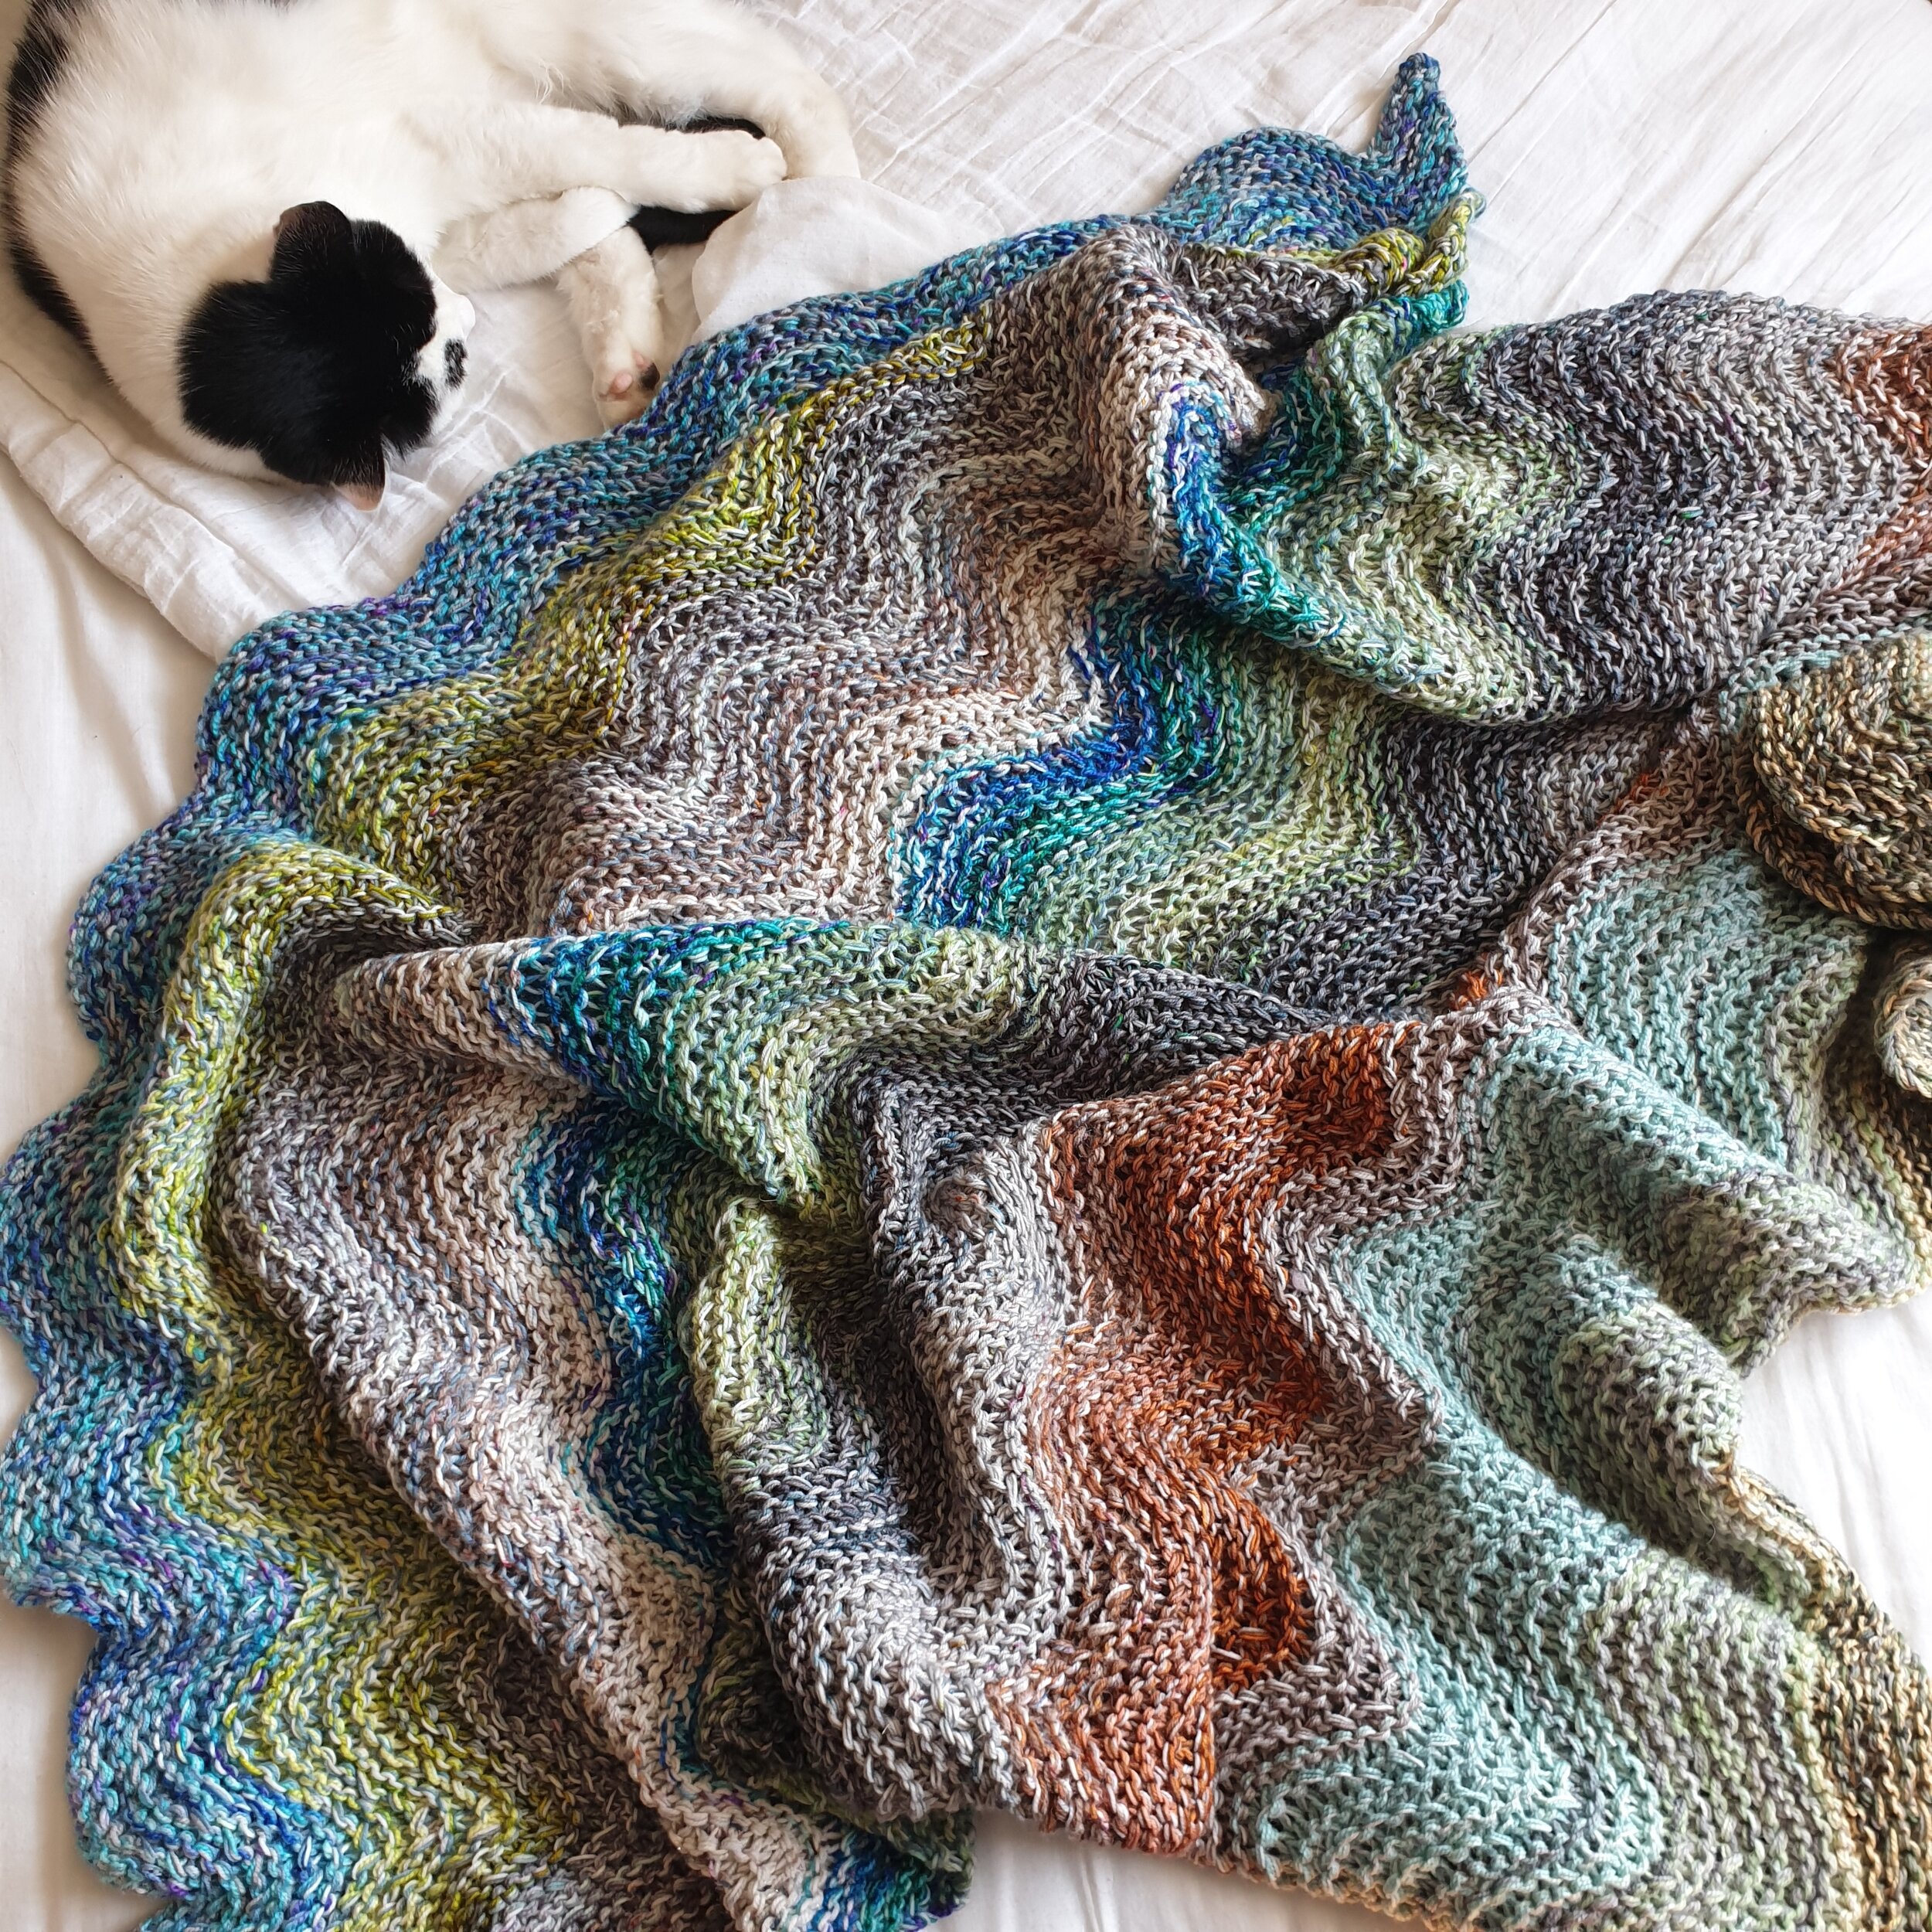
My blanket

After seeing some lovely knitted and crochet corner to corner blankets I opted for this style - mainly because the thought of a super long cast on did not fill me with enthusiasm. 

Yarn: West Yorkshire Spinners 4ply Signature Sock Yarn

Needles: 3mm

I cast on 3sts and I’m increasing 2 sts every right side row, until the midpoint when I’ll start the decreases. I’m knitting 4 rows (2 garter ridges) for every day.

If you are interested I’ve linked to my Ravelry project page and I’ll be doing updates once a month or so - as I’d hate to spam you with the thing. But I’m hoping that a monthly update will keep me accountable and stop the blanket from languishing in a corner.

Wish me luck. In the immortal words of Antarctic explorer Lawrence Oates “I may be some time”